Introduction
Patches may be the oldest form of visible repair. In Japan, farm families stitched and re-stitched indigo garments in a tradition called boro, held together with running stitches known as sashiko.
In India, women layered worn saris into quilts with the fine running stitch of kantha. Neither craft hid the mend. Both celebrated it, adding layer upon layer until the cloth told a story.
Later, patches became signals. Military units wore insignia to mark rank and regiment. Scouts earned badges that told you exactly what a child had learned. Riders stitched club colours onto the backs of denim vests to say where they belonged.
A hand-stitched patch belongs to that long line. It is repair, decoration, and memory in one small piece of cloth.
Here is the promise: a finished patch is an afternoon project. Not a weekend. Not a course. One sitting at the kitchen table, with floss, a needle, and a scrap of felt.
You do not need a machine, a studio, or perfect hands. You need a design small enough to finish before your tea goes cold, and the willingness to let it look handmade.
What a Good Patch Is Made Of
A patch is only as good as its base fabric. The ground you stitch on decides how the finished piece drapes, wears, and feels against skin.
- Cotton twill — tightly woven, takes a needle easily, and holds a crisp edge. Good for clean shapes and initials.
- Felt — wool or wool-blend is the friendliest beginner fabric. It does not fray, so the edges stay neat without hemming.
- Linen — beautiful texture and a slightly rustic look. It frays, so plan on a stitched border to contain it.
- Denim scraps — cut from worn jeans, they blend almost invisibly into jackets and knees.
- Canvas — sturdy and firm, ideal for patches that will be handled every single day.
Felt earns its reputation. It holds its shape, forgives a wobbly stitch, and lets you start and end without hiding tails in a hem. Wool-blend felt from a craft shop is firm enough for a 6cm patch.
Interfacing stiffens a floppy fabric. Iron a lightweight fusible interfacing to the back of cotton or linen before you stitch, and your patch will stop curling at the edges.
Stabilizer is the layer that keeps stitches from pulling the weave out of shape. For a hand-stitched patch, you have three honest choices.
- Fusible tear-away — ironed on, then torn off after stitching. Cheap and quick, but it can distort a soft outline.
- Cut-away — stays permanently and gives firm support. Best for dense satin work on thin fabric.
- Water-soluble — dissolves in cool water after stitching. Ideal when you draw or print the design on it, then rinse it away.
For a simple felt patch, you often need no stabilizer at all. Felt is stable enough to carry the thread on its own. Save the stabilizer for thin cottons and heavy stitch coverage.
Floss and Needle Specifics
Six-strand embroidery floss is the standard, and DMC is the reference brand most colour charts are written against. Each skein separates into six individual threads, called strands.
Separating strands matters. Cut a length of about 45cm, then pull one strand free at a time, slowly, from the top. Pulling two at once invites tangles and knots.
How many strands you use changes the look completely.
- Two strands — fine outlines, lettering, and delicate detail.
- Three strands — the everyday workhorse for outlines and borders.
- Four to six strands — bold lines and faster coverage on larger motifs.
- Six strands — satin stitch fills and raised, dimensional detail.
For satin stitch on a small shape, three to four strands give smooth coverage without bulk. For outlining, two or three strands keep the line crisp and readable.
Needles: embroidery sharps are the usual choice. They are short, with a sharp point and a small eye, and sizes 7 to 10 suit most floss work. Use a size 9 for two or three strands.
Tapestry needles have a blunt tip and a large eye. They are for counted work on evenweave, or for pulling floss through felt without splitting the fibres. Keep one of each on hand.
A thimble is optional. If you push a needle through several layers of denim, a leather thimble saves your fingertip. It is a comfort tool, never a requirement.
Other small things help. A needle book keeps sharps safe. Fine stork scissors trim thread tails cleanly. A spare needle threader spares your eyes on a tired evening.
Design Transfer Methods
You need your design on the fabric before you stitch. There are five reliable ways, and each one carries a trade-off worth knowing.
Drawing directly. On light fabric, sketch the shape straight onto the cloth with a water-soluble pen. Fast and free, but the markings can smear on dark or heavily textured fabric.
Iron-on transfer pen or pencil. Draw on paper, iron it face down onto the fabric, and the design transfers. It works on dark cloth, but the lines are permanent, so keep them under your stitches.
Water-soluble stabilizer sheets. Stick a printed or pre-drawn sheet onto the fabric, stitch straight through it, then rinse it away in cool water. Excellent for complex curves and dark denim.
Window or light box tracing. Tape the design and fabric to a sunny window and trace the lines. Simple, free, and surprisingly accurate for small motifs.
Pin a paper template and stitch through it. For felt, pin a paper shape on top, stitch along the drawn line through both layers, then tear the paper away. The paper acts as both guide and stabilizer.
The paper-template method is the classic felt technique, and it is the one I recommend for a first patch. It guarantees a clean outline and removes most of the guesswork from the process.
The Core Stitches
Six stitches cover almost everything a patch needs. Each takes minutes to learn and a lifetime to refine.
Backstitch is the outline stitch. Bring the needle up one stitch ahead, then back down into the last hole. The stitches meet end to end, giving a solid, unbroken line. Use it for bold outlines and lettering.
Split stitch gives a smooth, rounded line. Work it like backstitch, but bring the needle up through the middle of the previous stitch, splitting the thread. Use it for curves and fine lettering.
Satin stitch fills small shapes. Lay parallel stitches side by side across the shape, keeping the tension even. Use it for petals, leaves, and tiny solid motifs. Keep shapes small — long satin stitches snag.
Chain stitch makes a linked border. Bring the needle up, hold the loop, and take the needle back down inside the same hole. Use it for borders and decorative lines.
Whipped backstitch raises an outline. Work a line of backstitch, then wrap a second thread around each stitch without going through the fabric. Use it for a corded, dimensional edge.
French knot adds accents. Wrap the thread twice around the needle, then take it back down beside the entry point. Use knots for flower centres, eyes, and dots.
Start and end without knots on the front. Anchor your first stitch by trapping the tail under the first few stitches, and finish by running the thread under the back of your work.
Finishing the Patch Edge
The edge is what makes a patch read as finished. Left raw, even felt will eventually soften and shed fibres with handling.
Buttonhole stitch, also called blanket stitch, is the traditional finish. Work it around the border, spacing the legs evenly and keeping the loops on the rim. It covers the raw edge and creates a firm, decorative line.
Blanket stitch does two jobs. It seals the edge against fraying, and it gives the patch a sturdy rim that survives handling and washing.
For felt, the technique is a sandwich. Cut two identical felt shapes and stitch your design through both layers, or stitch one layer onto a slightly larger backing piece.
Then trim. Once your border is complete, trim the felt 3 to 4mm outside the stitched line, using sharp scissors and small, even snips. Space the snips so the looped edge stays intact.
If you want a flat back, iron a piece of fusible web to the reverse of the finished patch. It gives you a smooth surface for ironing onto a garment later on.
Attaching a Patch So It Survives the Wash
How you attach a patch decides how long it lasts. There are three approaches, and honesty helps here.
Sew-through. Stitch the patch to the garment around its border, through all layers. It is the most durable method by a wide margin and survives years of washing.
Iron-on fusible web. Fast and clean, with no needle required. Over time, though, the adhesive lifts at the corners, especially on denim that flexes and on fabric blends that repel glue.
The belt-and-braces method. This is what I recommend. Fuse the patch in place to position it, then stitch around the edge to keep it there. You get the speed of ironing and the permanence of thread.
There is also a no-sew option: fabric glue. It works for a costume or a temporary fix, but it stiffens the cloth, cracks with washing, and rarely holds past a dozen cycles. Use it knowing that.
Whichever method you choose, stitch through the patch and the garment, not just the patch. A patch sewn only to itself will peel away with the fabric beneath it.
Placement Ideas and Projects
Where a patch goes changes the whole garment. Here are placements that work, and the projects they suit.
Denim jacket back panels and sleeves. A large patch on the back, or a sleeve of small motifs, turns a plain jacket into a personal record. Sleeves are forgiving — small patches hide wobbles.
Mending a torn knee or elbow. Patch straight over the tear. The patch becomes the mend, and a visible repair is sturdier than an invisible one on a worn edge.
Monogram initials on a tote. Two or three satin-stitched letters on a canvas bag make a calm, useful gift. Keep the letters about 3cm tall so the satin stays manageable.
A kid's backpack or lunch bag. Small felt shapes — a star, an animal — stitched on firmly, then reinforced at the corners. Children's things take hard wear, so sew-through is best.
Covering a stain. A favourite shirt with an ink mark or a stubborn stain can be saved by a patch placed exactly over it. Choose a shape that suits the garment.
A row of small patches on a denim cuff. Five or six tiny motifs in a line along the cuff read as a delicate, deliberate border. This is a lovely place to use fall embroidery patterns for seasonal motifs like leaves and acorns.
The rule of placement is simple. Put the patch where your eye wants to rest. Balance a large shape with a small one, and keep edges aligned with seams where you can.
A Beginner Project on Felt
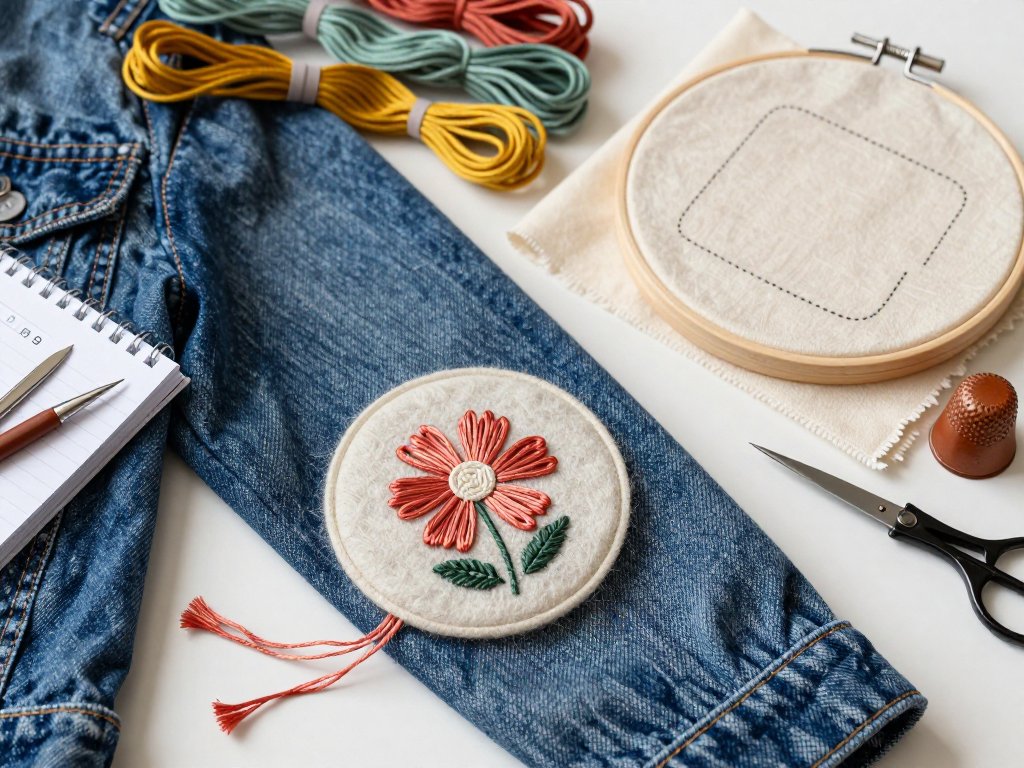
Here is a complete first project: a small flower on a 6cm felt patch. Allow 45 to 90 minutes, depending on how many French knots you decide you love.
- Gather. One 6cm circle of wool-blend felt, a 7cm backing circle, DMC floss in three colours, a size 9 sharp, and scissors.
- Draw the design. Sketch a five-petal flower about 4cm across on paper. Keep the petals small — no wider than 1cm each.
- Transfer. Pin the paper template onto the felt and stitch through both layers, or draw the shape on the felt with a water-soluble pen.
- Outline the petals. Backstitch each petal with two strands in your main colour, working around the shape in one continuous line.
- Fill the centre. Satin stitch the flower centre with three strands in a contrasting colour, laying the stitches side by side.
- Add leaves. Split stitch two small leaves with two strands in green, then fill each one with a few straight stitches.
- Finish the edge. Blanket stitch around the felt circle with three strands, keeping the loops even and the spacing regular.
- Trim. Cut the felt 3 to 4mm outside the stitched border, then tear or trim away the paper template.
- Attach. Fuse the patch to the garment, then stitch a second line just inside the blanket-stitch border to lock it down.
Where might you go slightly off? Petals may sit unevenly, the satin centre may look lumpy, and the border stitches may vary in height. All of that is normal, and all of it is fixable or ignorable.
A lumpy satin stitch reads as texture. Uneven petals read as drawn by hand. The patch will still be yours, and nobody will measure the stitches unless you invite them to.
Care and Washing
Care is simple if the patch is stitched on. Turn the garment inside out before washing, and use cold water on a gentle cycle. Hot water and agitation are what pull stitches loose.
Air dry when you can. A low tumble is fine for denim, but air drying protects floss colour and keeps the patch sitting flat.
Ironing needs one rule. Press on the reverse side, and never set a hot iron directly on the stitched patch. Direct heat flattens the floss and can scorch felt.
If a loose thread appears, do not pull it. Pulling tightens the surrounding stitches and distorts the design. Instead, thread the tail onto a needle and work it back under the stitches.
Hand-wash anything delicate. A patch on a silk blouse or a soft knit should be washed by hand, pressed gently, and dried flat on a towel.
Conclusion
Hand work is forgiving. A crooked line, a knot in the wrong place, a petal that leans — these are the marks that tell a stranger a person made this, slowly, on purpose.
Imperfection is not a flaw in handmade work. It is the signature. Machine embroidery can be flawless; a hand-stitched patch is meant to carry a pulse.
So look at the next worn thing in your wardrobe. The jacket with the frayed cuff, the bag with the scuffed corner, the shirt with the quiet stain. Before you replace it, patch it.
You already know the stitches now. Pick up a needle, choose a colour, and give the thing a second life. The cloth will thank you, and so will the person who notices.