Introduction
I still remember the first time I tried to draw a shadow. It was a rainy Saturday afternoon, and I was maybe twelve years old, sitting cross-legged on my grandmother's braided rug with a set of ballpoint pens I had fished out of the kitchen junk drawer. My subject was a ceramic bird she kept on the windowsill — a chubby little robin with its head tilted, as if listening for worms. I wanted so badly for that bird to feel round and real on the page, but everything I drew came out flat. The belly looked like a cookie cutter shape. The wing was a single sad outline.
My grandmother, who could sketch a convincing rose in under thirty seconds with nothing but a stubby pencil, glanced over my shoulder and said something I have never forgotten: "You are trying to outline the shadow, sweetheart. You have to let the lines become the shadow." She picked up my pen and, in the space beneath the robin's chin, added a cluster of tiny intersecting lines — tight, deliberate, nothing like the scribbles I had been making. Suddenly the bird had weight. It sat. It felt solid.
That was my first lesson in cross-hatching, and it is the same lesson I want to share with you today. If you have ever felt frustrated by flat-looking drawings, or wondered how illustrators create those gorgeous ink pieces full of texture and atmosphere, cross-hatching is your answer. It is one of the oldest, simplest, and most forgiving techniques in drawing — and you can start learning it this afternoon with nothing more than a pen and a piece of paper.
What Exactly Is Cross-Hatching?
At its core, cross-hatching is exactly what it sounds like: you draw one set of parallel lines, and then you draw another set of parallel lines that cross over the first set at an angle. Where the lines overlap, the eye perceives a darker value. The closer the lines are together, and the more layers you add, the darker that area appears.
Think of it like weaving thread on a tiny loom. Every line is a strand. Where the strands are sparse, light passes through. Where they cluster, the weave tightens and the surface darkens. Your pen becomes the shuttle, and the page becomes your fabric.
What makes cross-hatching so powerful is that it does not rely on having the "right" pencil or the ability to blend smoothly — skills that can take years to develop. Instead, it uses a simple, repeatable mechanical action that anyone can learn in an afternoon. The magic is not in the tool. It is in the pattern.
Why Ink? Why Not Pencil?
You might wonder why this technique is most often taught with pen and ink, when pencil seems so much more forgiving. The answer is a beautiful one: ink forces you to commit. You cannot erase. You cannot smudge and soften. Every mark you make stays exactly where you put it, which means you learn to be intentional in a way that pencil drawing does not demand.
This sounds intimidating, I know. I felt the same way when I first switched from pencil to pen. But here is the secret that experienced ink artists know: the permanence of ink is actually a liberation, not a constraint. Once you accept that your "mistakes" are just part of the texture, you stop worrying about perfection and start enjoying the process. Every stray line becomes character. Every unexpected cross-hatch becomes atmosphere.
There is also something deeply satisfying about the crisp, clean look of an ink drawing. The high contrast between black lines and white paper gives cross-hatched illustrations a graphic quality that photographs simply cannot replicate. Think of the woodcut illustrations in vintage books, the architectural sketches in old travel journals, or the comic panels of classic graphic novels. That look — timeless, sophisticated, handmade — is achievable with nothing more than a pen, patience, and a little practice.
Getting Started: What You Will Need
The beauty of cross-hatching is that the supply list is almost laughably short. You do not need special paper, expensive pens, or any of the gear that craft stores try to convince you are essential. Here is what I recommend for a beginner:
- A fine-tip pen (0.3mm or 0.5mm). Tech pens like the Sakura Pigma Micron or the Copic Multiliner are excellent, but a simple ballpoint pen works too. The key is consistent ink flow and a tip that is fine enough to let you control line density. Avoid gel pens that blob or felt-tip pens that bleed.
- Any smooth paper. Printer paper is perfectly fine for practice. If you want something a bit nicer, look for a smooth bristol board or a mixed-media sketchbook. Smooth paper is important — textured paper catches the pen nib and creates uneven lines that frustrate beginners.
- A reference image. Choose a photograph with clear light and shadow — a fruit on a table, a face in profile, a simple landscape. The stronger the contrast in the photo, the easier it will be to see where to place your hatches.
- Patience and a cup of tea. Cross-hatching is a slow craft. That is part of its charm. Settle in and give yourself permission to take your time.
That is truly all you need. No erasers, no blending stumps, no fancy equipment. Just you, a pen, and a willingness to make a lot of tiny lines.
The Four Foundational Hatching Patterns
Before you start layering cross-hatches, it helps to master the individual strokes. Think of these as the alphabet of ink drawing. Once you know the letters, you can spell anything.
1. Basic Hatching (One Direction)
This is the simplest form: a set of parallel lines all running in the same direction. Practice drawing lines that are evenly spaced, consistent in length, and parallel to each other. Angle them diagonally — about 30 to 45 degrees from horizontal — because diagonal lines feel more dynamic and natural than vertical or horizontal ones.
Your goal is not speed. Your goal is consistency. Can you make ten lines in a row that look like they were drawn by the same hand? Can you keep the spacing between them uniform? Try filling a small square with diagonal lines, then another square with lines at the opposite diagonal. This is your warm-up, like scales on a piano.
2. Cross-Hatching (Two Directions)
Once you have a comfortable diagonal hatch, add a second layer of lines crossing the first at a perpendicular angle. This is the classic cross-hatch — the technique my grandmother showed me on that rainy afternoon.
The angle between the two layers matters. If you cross at 90 degrees (a right angle), the grid looks very structured and orderly, which works well for architectural subjects. If you cross at 60 or 70 degrees, the pattern feels softer and more organic, which is better for portraits, nature, and expressive work.
Try both and notice how the feel of the drawing changes. There is no right answer — only the effect you want to create.
3. Contour Hatching (Following the Form)
This is where cross-hatching stops being a mechanical exercise and starts becoming real drawing. Instead of laying down straight parallel lines, curve your lines to follow the shape of the object you are drawing.
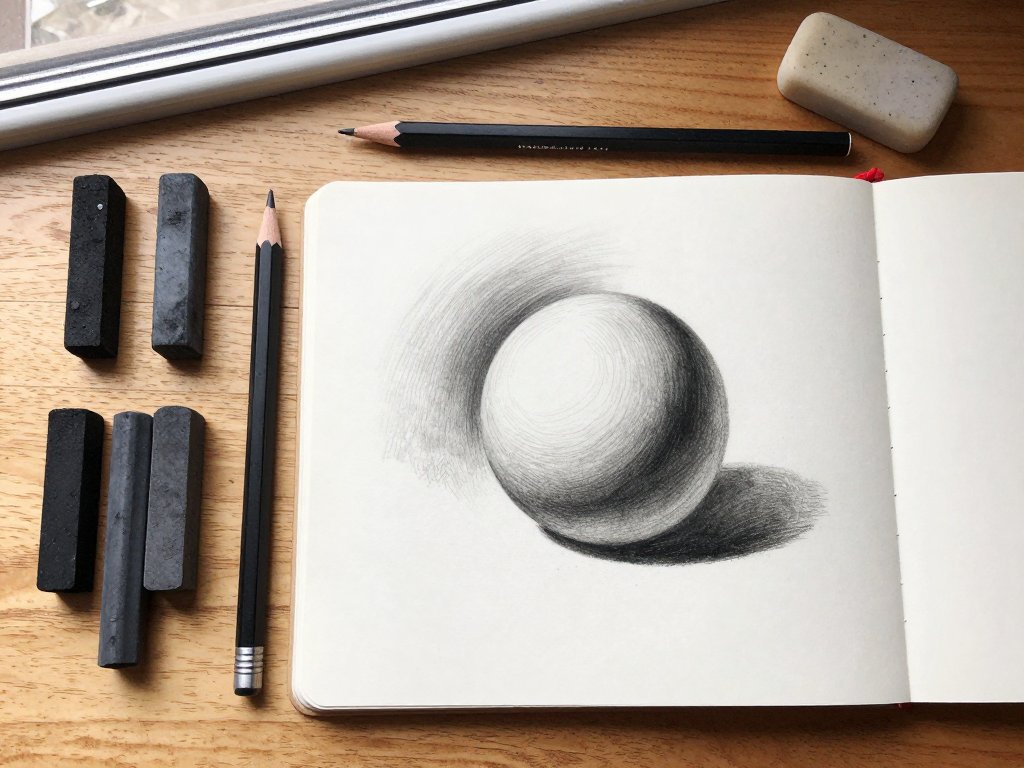
Imagine you are drawing a sphere. A straight cross-hatch would flatten it. But if you curve your lines around the sphere's surface — like lines of latitude on a globe — the hatching itself creates the illusion of roundness. The lines become the form.
Contour hatching takes practice because you are thinking about two things at once: the value (how dark the area should be) and the shape (how the surface curves). Start with simple cylindrical objects — a mug, a candle, a bottle — and work your way up to more complex forms.
4. Stippling and Dense Layering
For the darkest shadows, you can add a third or even fourth layer of hatches at different angles. This creates a rich, dense black that has far more visual interest than simply filling the area with solid ink. Up close, you see the individual lines. From a distance, the eye blends them into a deep, velvety shadow.
Some artists finish their darkest areas with stippling — tiny dots placed close together. Stippling takes a long time but produces a beautiful, airy darkness that cross-hatching alone cannot achieve. Try combining three layers of cross-hatch with a bit of stippling in the very darkest corners of your drawing.
Understanding Value: The Heart of Cross-Hatching
Value is simply how light or dark something is. In ink drawing, you cannot mix gray ink or dilute your lines. You create the illusion of gray by controlling the density of your marks. This is the single most important concept to understand.
Here is a simple exercise that changed the way I approach every drawing. Draw a row of five small squares, each about one inch across. Leave the first square completely empty — that is your white, or value 1. In the fifth square, fill with the densest cross-hatching you can manage — as many layers as it takes to make it look nearly black. That is your black, or value 10. Now fill in squares two, three, and four with increasingly dense hatching: a single light layer, a medium cross-hatch, and a heavier two-layer cross-hatch.
This is your personal value scale. Refer to it while you draw. When you look at your reference and see a medium shadow, ask yourself: "Which square on my scale matches this shadow?" Then match the density. It is a simple system, but it works wonders for beginners who feel overwhelmed by the endless possibilities of where to put lines.
Common Beginner Mistakes (And How to Fix Them)
Every ink artist I know — myself very much included — has made these mistakes. Recognizing them is half the battle.
Mistake 1: Lines that are too long or too short. Hatching lines should generally be about a quarter-inch to half-inch long. If they are too long, they become obvious and distracting. If they are too short, the eye cannot follow the pattern. Practice making lines of consistent length.
Mistake 2: Uneven spacing. Gaps between your lines that are sometimes wide and sometimes narrow create a patchy, blotchy look. Slow down and pay attention to spacing. It helps to rotate your paper as you work so your hand stays in a comfortable, natural position.
Mistake 3: Stopping at the edge of the shadow. Beginners tend to outline a shadow first and then fill it in, like a coloring book. Instead, let your hatches cross the boundary between light and shadow. The lines should not end abruptly at an invisible border — they should fade naturally by getting sparser and lighter as they move into the lit area.
Mistake 4: Using only one hatch angle. If all your cross-hatches go in the same direction, the drawing looks stiff and mechanical. Vary your angles. Combine diagonal hatches with curved contour hatches. Let the direction of your lines respond to the shape of the subject.
Mistake 5: Giving up too soon. Cross-hatching looks unfinished until it is nearly complete. A drawing with only one or two layers of hatching looks scratchy and tentative. Push through that awkward middle stage. Add another layer. Trust that it will come together. It almost always does.
How to Choose Your Subject: Starting Simple
The biggest mistake new cross-hatchers make is choosing a subject that is too complex. I understand the temptation — you want to draw something impressive, like a portrait or a detailed landscape. But the fastest path to impressive work is starting simple and building skills methodically.
Here are my recommendations for subjects, in order of difficulty:
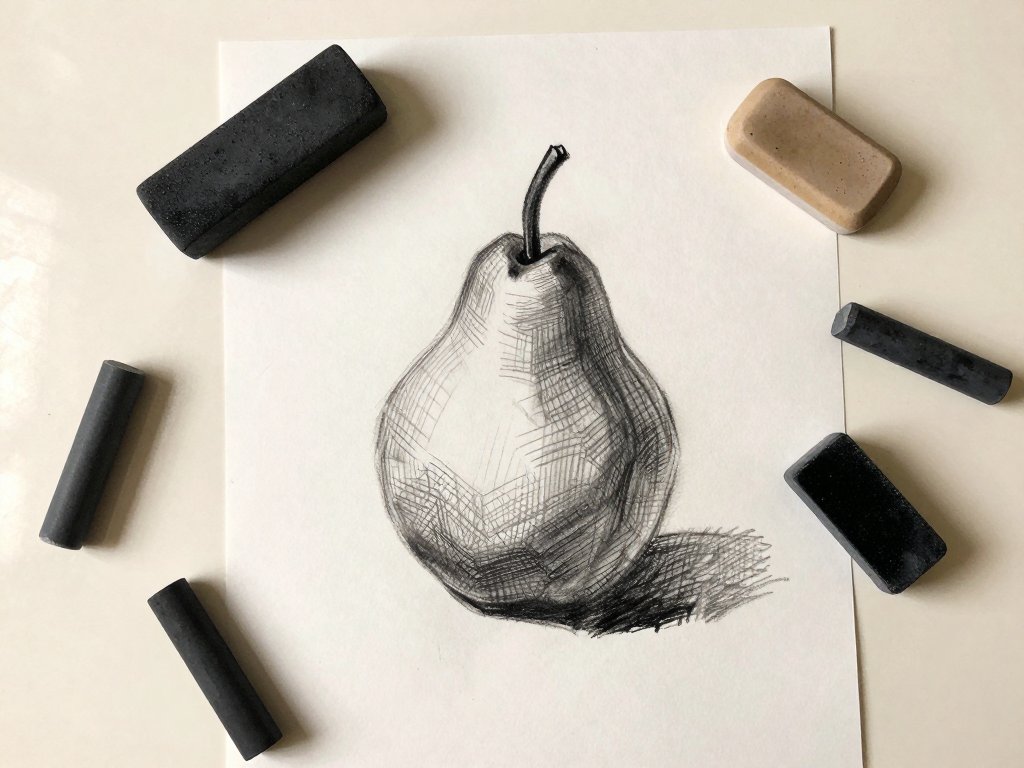
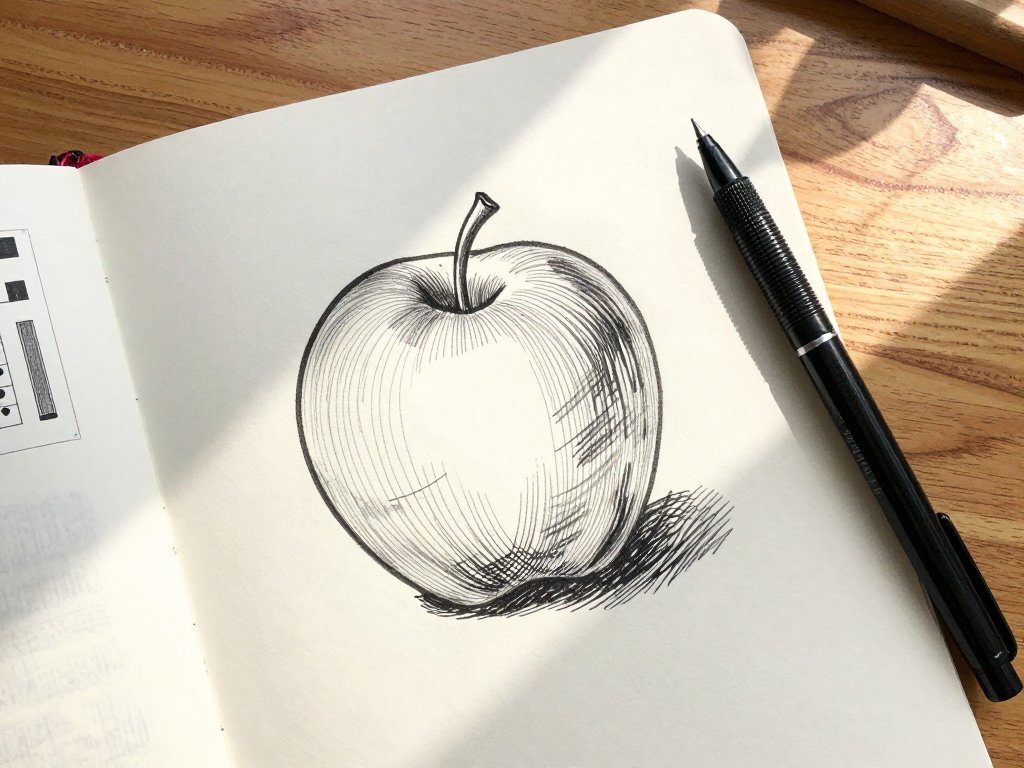
Beginner (first week): A single piece of fruit — an apple, a pear, a lemon. Place it under a desk lamp so the light comes from one side. The clear, simple shadow shape gives you a perfect training ground for basic cross-hatching.
Intermediate (first month): A still life with two or three objects. Add a textured object like a woven basket or a ceramic vase. Practice contour hatching on the curved surfaces and experiment with different line densities.
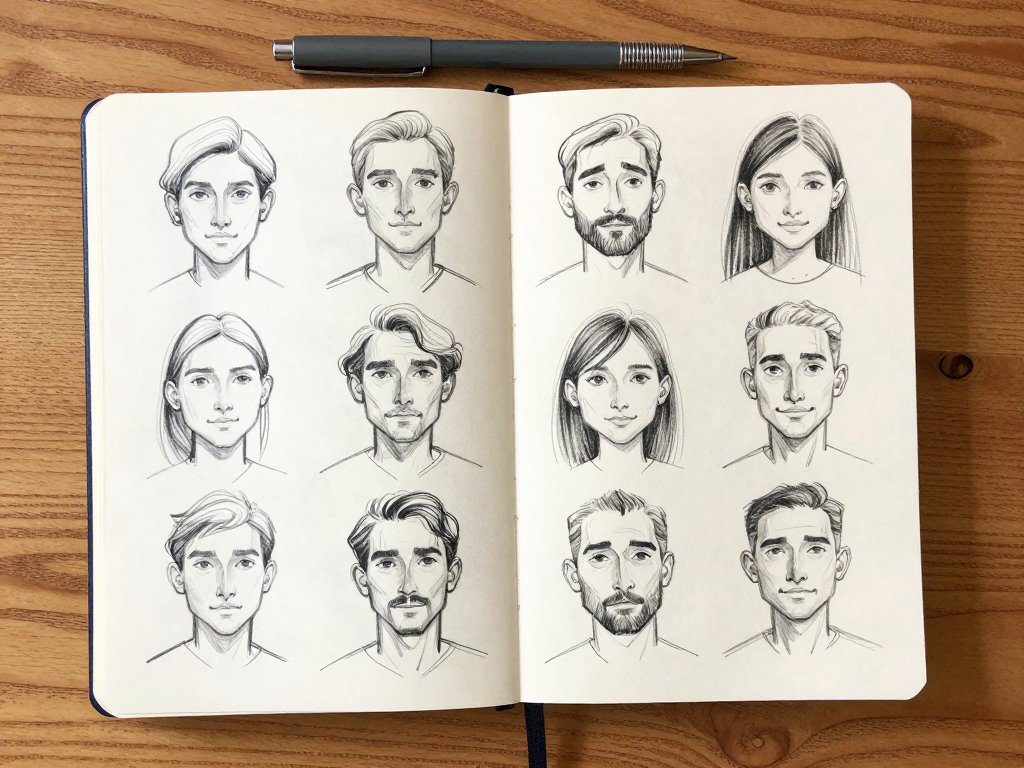
Advanced (ongoing): A face in profile, a landscape with trees and sky, or a complex architectural detail. By now, your hand knows the motions, and your eye knows how to see value. You can focus on expression and atmosphere.
The Meditative Side of Cross-Hatching
One of the reasons I love cross-hatching — and why I think it is such a perfect craft for busy moms who rarely get a quiet moment — is that it is deeply meditative. There is something about the rhythm of laying down line after line that quiets the mind in a way that scrolling through social media never can.
When I am cross-hatching, I am not thinking about the grocery list or the email I forgot to send or the million tiny decisions that fill a mother's day. I am thinking about the next line. And the line after that. And the line after that. The world shrinks to the size of my paper, and for twenty or thirty minutes, nothing exists except the dance of ink and light.
I have started keeping a small sketchbook on my kitchen counter. While I wait for the kettle to boil, I add a few lines to whatever I am working on. While the kids finish their homework, I pull it out and hatch another corner. These tiny moments add up surprisingly fast. A drawing that takes two hours of concentrated time can be completed over the course of a week, five minutes at a time, without ever feeling like a burden.
That, to me, is the real gift of cross-hatching. It is not about creating gallery-worthy art. It is about finding a pocket of stillness in a busy day and filling it with something beautiful.
Bringing It All Together: A Mini Project
Let me walk you through a small project that puts everything we have discussed into practice. This should take you about an hour, and by the end, you will have a finished drawing you can be genuinely proud of.
Step 1: Choose a simple object — an apple, a mug, or a small potted plant. Set it on a table beside a window or under a lamp. The light should hit it from one side, creating a clear highlight on the lit side and a distinct shadow on the opposite side.
Step 2: Lightly sketch the outline of your object in pencil. I know we are working in ink, but a faint pencil guideline helps you place the drawing on the page. Keep the outline simple — just the outer shape, no details.
Step 3: Identify the three main value zones on your object: the light area (closest to the light source), the mid-tone area (the transition zone), and the dark area (the shadow side plus the cast shadow on the table). If it helps, squint your eyes — this blurs the details and makes the value zones much easier to see.
Step 4: Begin hatching in the mid-tone area first. Yes, the mid-tone, not the darkest shadow. This prevents you from making the whole drawing too dark too quickly. Use a single layer of diagonal hatches, keeping the lines about a pen-nib-width apart.
Step 5: Add a second layer of cross-hatches in the dark area. For the very darkest shadows, add a third layer at yet another angle. Leave the light area completely empty — the white of the paper is your highlight.
Step 6: Add contour hatches along curved edges. If your subject is round (like an apple), curve your lines to follow its surface. This turns a flat diagram into a believable three-dimensional object.
Step 7: Step back and assess. Hold the drawing at arm's length. Does the overall balance feel right? Are the darkest areas dark enough? If they feel too light, add another layer of hatching. If they feel too dark, well — you cannot lighten ink, but you can add more lines to the areas around it to balance the composition.
Step 8: Sign your name and date it. This is important. You made something. Celebrate that.
Beyond the Basics: Where Cross-Hatching Can Take You
Once you have the fundamentals down, cross-hatching opens doors to a remarkable range of artistic styles. Some illustrators use it for meticulous architectural renderings where every brick and beam is defined by the direction of the hatch. Others use it for loose, expressive figure drawings where the hatching seems almost wild, but somehow resolves into perfect form when you step back.
In graphic novels, cross-hatching is a storytelling tool. Frank Miller's iconic work in "Sin City" uses high-contrast cross-hatching to create a noir atmosphere so thick you can almost feel the rain on your skin. In scientific illustration, cross-hatching has been used for centuries to depict the texture of fossils, the structure of plants, and the topography of distant mountains. In fashion illustration, it captures the drape and fold of fabric with a lightness that solid shading cannot match.
The point is that cross-hatching is not a single technique with a single use. It is a language. Once you learn the alphabet — those four patterns we practiced earlier — you can say anything you want. A moody portrait. A whimsical botanical. A detailed urban sketch. A handmade card for a friend that feels personal and precious in a way that a store-bought card never could.
And here is the best part for those of us with limited time and a limited budget: you never need more supplies. A single pen can last for months. A ream of printer paper costs less than a coffee shop visit. You can cross-hatch at the kitchen table, on the train, in a waiting room, or in bed after the house goes quiet. No setup, no cleanup, no space requirements. Just you and your lines.
Conclusion
When I look back at that twelve-year-old girl on her grandmother's rug, frustrated by a flat ceramic bird, I wish I could tell her that the answer was not a better pencil or more natural talent. It was simply a willingness to make lines — lots of them, crossing each other at different angles, building value one stroke at a time.
Cross-hatching taught me that art does not have to be mysterious. It can be methodical. It can be a craft that you practice like knitting or woodworking, getting better with every repetition. You do not have to be "gifted" to create beautiful ink drawings. You just have to pick up a pen and start making marks.
So find a quiet afternoon — or even a quiet ten minutes — and give it a try. Draw a line. Then draw another one that crosses it. Watch what happens to the space where they meet. That tiny intersection, barely visible on its own, is the seed of something much larger. With enough of them, you can build a world.
And the next time you feel frustrated because your drawing does not look the way you imagined, remember what my grandmother told me: you are not trying to outline the shadow. You are letting the lines become the shadow. Trust the lines. They know what to do.