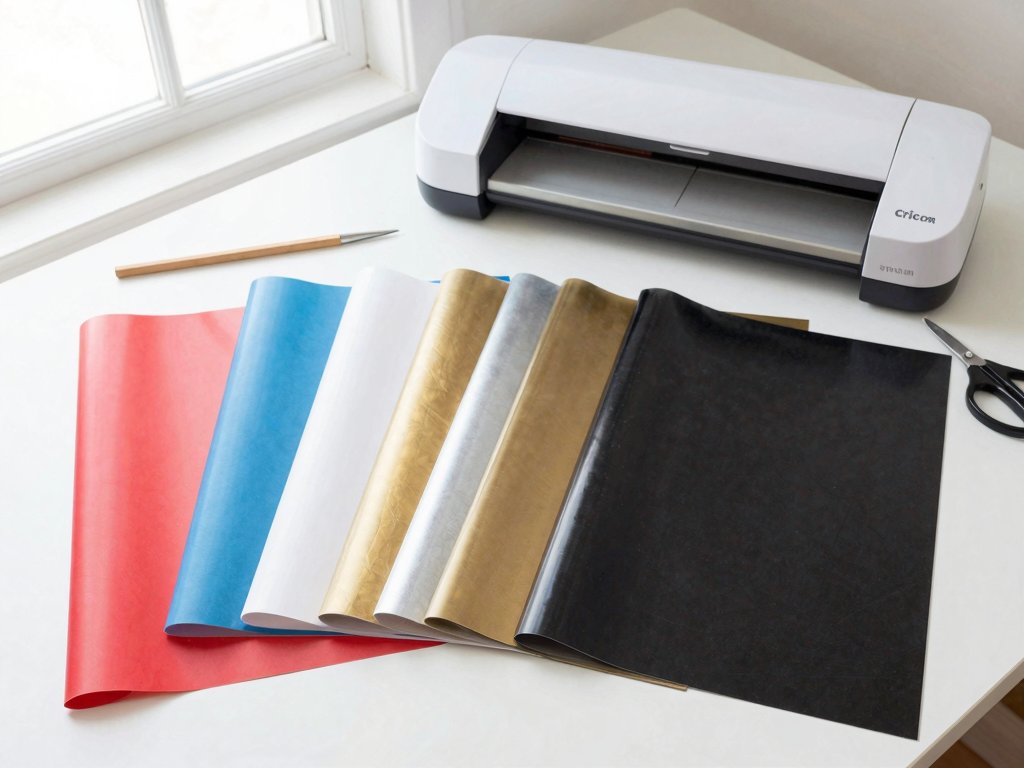
Understanding Your Cricut Vinyl Options
When you first unbox your Cricut machine, the variety of vinyl sheets staring back at you can feel daunting. Permanent, removable, heat transfer, printable – what does it all mean? Each type serves a specific purpose, and knowing which one to use will save you from costly mistakes and ensure your projects turn out beautifully.
Think of vinyl like fabric – just as you wouldn't use denim for a summer dress, you shouldn't use permanent outdoor vinyl for a temporary wall decal. Let's walk through the main categories so you can shop with confidence.
Vinyl has come a long way since the early days of crafting. Modern adhesive technology means you have options that work for everything from delicate painted walls to industrial equipment. The key is matching the right vinyl to your specific project needs. I remember when my grandmother tried to put regular shelf liner on her car window – it lasted three days in the sun! Today's specialized vinyls can handle extreme conditions.
Permanent Adhesive Vinyl: Your Everyday Workhorse
Permanent vinyl is exactly what it sounds like – designed to stick around. This is your go-to choice for projects that need to withstand regular handling, cleaning, or exposure to the elements. Understanding when and how to use permanent vinyl correctly will save you from frustrating re-dos.
Permanent vinyl works beautifully for:
- Mugs and tumblers that go through the dishwasher
- Car windows and bumpers (weather-resistant)
- Outdoor signs and address markers
- Kitchen appliances you want to personalize
- Boat and RV decals
- Toolboxes and workshop equipment
Top Brands for Permanent Applications:
Oracal 651 is the gold standard for permanent adhesive vinyl. It offers excellent UV resistance, meaning your colors won't fade quickly in sunlight. I've had Oracal 651 signs on my mailbox for over three years with minimal color change. Cricut Premium Vinyl also performs well and is widely available, though I find it slightly thicker which can be challenging for intricate cuts.
Brands like Oracal 651 and Cricut's Premium Removable actually work wonders here. They'll withstand years of handling and cleaning. I learned this the hard way when I used removable vinyl on my coffee mug – two washes later, my carefully crafted design was floating in the dishwasher.
Thickness matters with permanent vinyl – the thicker sheets (usually 3mil and up) hold their shape better on curved surfaces like water bottles, while thinner sheets work well for flat applications like laptop skins. For projects with multiple layers, consider the thickness stack-up. Three layers of 3mil vinyl equals almost the thickness of a credit card!
Application Temperature Matters: Apply permanent vinyl when temperatures are between 50-90°F. Cold weather makes the adhesive less tacky, while excessive heat can cause premature adhesion before you're ready.
Removable/Decal Vinyl: Perfect for Renters and Experimenters
If you're renting, love changing up your decor, or just want to test designs before committing, removable vinyl is your best friend. It adheres well enough to stay put but peels off cleanly without residue. This flexibility makes it ideal for crafters who like to refresh their spaces frequently.
Removable vinyl works beautifully for:
- Wall quotes and decals (especially in kids' rooms)
- Seasonal decorations you swap out
- Scrapbook layouts where you might want to adjust placement
- Project mockups for clients
- Dorm room decorations
- Party backdrops and temporary signage
Cricut's Removable line and Oracal 631 are excellent choices here. Pro tip: test a small piece on your surface first – some painted walls are more delicate than others. I always wait 24 hours after painting before applying any vinyl, even removable types. Fresh paint needs time to cure fully.
Color matching is easier with removable vinyl since you can adjust placement. I keep a sample pack of matte and glossy finishes to see how they look in different lighting before committing to a full project. Different paint finishes (eggshell vs. satin vs. semi-gloss) can affect how vinyl adheres and removes.
Removal Technique: Remove vinyl at a 45-degree angle, pulling slowly and steadily. If any residue remains, a hair dryer on low heat softens the adhesive for easy cleanup. Rubbing alcohol works wonders for stubborn spots.
Heat Transfer Vinyl (HTV): For Wearable Creations
Heat transfer vinyl transforms ordinary items into personalized treasures. Unlike adhesive vinyl, HTV uses heat-activated adhesive to bond with fabric. This opens up an entirely different category of projects – clothing, pillows, tote bags, and anything made of fabric. The learning curve for HTV is different from adhesive vinyl, so practice on fabric scraps first.
HTV Varieties Explained:
HTV comes in several varieties, each suited for specific applications:
- Standard HTV: Basic colors and finishes, works on cotton and cotton blends. Great for everyday wear items.
- Glitter HTV: Adds sparkle to any project (kids love this). Best for accents rather than full designs due to stiffness.
- Foil/fashion HTV: Gives a metallic or holographic effect. Perfect for special occasion wear.
- Stretch HTV: Essential for athletic wear and spandex. Contains elastomeric materials that move with the fabric.
- Sublimation HTV: Accepts dye-sublimation prints for photo-quality transfers.
I always recommend starting with a basic bundle of Siser Easyweed – it weeds easily and presses beautifully. Glitter HTV is magical for kid projects, but it can be harder to weed. Use a light-colored base for best results. Dark fabrics often require a white base layer first.
Heat Application Essentials:
Heat application requires practice. Start with a household iron if you're budget-conscious – it works perfectly for small projects. Just make sure to use a thin cloth between the iron and vinyl, and apply firm, even pressure for 10-15 seconds. For larger projects, a heat press delivers consistent results.
Temperature and timing are crucial – too little heat and your design will peel, too much and you'll scorch the fabric. Each vinyl brand has recommended settings, but I suggest testing on a fabric scrap first. Heat-resistant tape is a small investment that saves frustration on multi-layer designs.
HTV Application Settings by Fabric Type:
- Cotton/Polyester blends: 305°F for 10-12 seconds
- Athletic wear (stretch): 275°F for 8-10 seconds
- Canvas/tote bags: 320°F for 12-15 seconds
- Wool sweaters: 275°F for 8 seconds
Printable Vinyl: When You Need Full-Color Designs
Sometimes a single color just won't cut it. Printable vinyl lets you create full-color designs that you can cut with your Cricut. This is especially valuable for photo projects, detailed logos, or when you need exact color matches. The technology has improved dramatically, making home printing viable for professional-looking results.
Printer Compatibility:
You'll need:
- A compatible inkjet printer (laser won't work)
- Sheets of printable vinyl
- Clear laminate sheet for extra durability
Not all inkjet printers are created equal for printable vinyl. Epson Ecotank and Canon PIXMA series perform exceptionally well due to their pigment-based inks. Dye-based inks fade faster in sunlight, so plan accordingly. Set your printer to "photo" or "glossy" mode for best color saturation.
This is fantastic for complex designs, photo transfers, or when you need exact brand colors. The quality depends heavily on your printer – I've had great results with newer Canon and Epson models. Let the ink dry completely before cutting, and store unused sheets in a sealed bag to prevent curling.
The one limitation: printable vinyl is generally not dishwasher-safe. Hand-washing is recommended for longevity, making it better suited for decorative items rather than daily-use drinkware. Consider printable vinyl for signs, wall art, and gifts rather than functional kitchen items.
Specialty Vinyl Worth Knowing
Chalkboard Vinyl
Perfect for labeling jars, making menu boards, or creating reusable kids' activity surfaces. Writes just like a real chalkboard with regular chalk or chalk markers. The matte finish accepts chalk beautifully, and you can erase and rewrite dozens of times. This is a game-changer for families – my kids love updating our weekly menu board!
Metallic and Holographic
These add serious wow factor to projects. Great for holiday ornaments, wedding decor, or accenting simple designs. They tend to be pricier, so I use them sparingly as highlights rather than full-coverage designs. A little goes a long way with these specialty finishes.
Glow-in-the-Dark
Children absolutely love this for bedroom accents, camping gear, or trick-or-treat bags. Charge it with sunlight or bright lights for the best glow effect. The phosphorescent material stores light energy and releases it gradually in darkness. Pro tip: layer over white vinyl for maximum brightness.
Glitter and Sparkle Vinyl
While technically adhesive vinyl, glitter vinyl deserves its own category due to unique handling requirements. The textured surface can be challenging for fine details, and weeding requires extra patience. Use a weeding hook rather than tweezers to avoid pulling up unintended pieces.
Money-Saving Strategies That Actually Work
Craft supplies add up quickly, but vinyl doesn't have to break the bank. Here are strategies I've tested and refined over years of crafting. The key is buying smart and wasting less.
Buy in Bulk During Sales
Keep an eye on Michaels, Joann, and Hobby Lobby sales – they often run 50-70% off coupons. However, don't buy everything at once. Vinyl does have a shelf life, especially printable varieties. Heat and light accelerate degradation, so store properly.
Instead, focus on buying multi-color packs during sales. A 48-color pack drops to around $15 during a good sale – that's 31 cents per color compared to $2-3 per single sheet regularly. Look for end-of-season clearance – I stock up on holiday colors after Christmas for next year's projects.
Timing Your Purchases: Major sales happen during back-to-school (July-August), Black Friday, and January clearance. Sign up for store emails to get advance notice of sales. Some stores offer app-exclusive coupons that stack with sale prices.
Shop Alternative Brands
Cricut brand is reliable but expensive. Oracal, Siser, and even Amazon's generic brands often perform identically for less. I've compared Oracal 651 directly against Cricut Premium – zero difference in durability or ease of use. The manufacturing quality has improved across the industry.
Brand Comparison Chart:
- Oracal 651: Best value, excellent durability
- Siser Easyweed: Superior HTV, easy weeding
- Cricut Premium: Convenient but pricier
- Amazon Basics: Budget option for practice cuts
Join Craft Groups and Facebook Marketplace
Local buy-nothing groups and Facebook Marketplace are goldmines for partially used vinyl collections. Crafters often sell their excess for pennies on the dollar. I once got a box of 100+ sheets for $20 from someone who was moving.
Search for "Cricut," "vinyl," or "crafting supplies" in local buy-sell-trade groups. Mention what colors or types you need. Many crafters are happy to share or sell scraps cheaply. Just verify the vinyl is still in good condition – check expiration dates on printable varieties.
Master Efficient Design Layout
Every tiny scrap can be used for something. I keep a scrap bin of pieces larger than 2x2 inches. Challenge yourself to use smaller pieces for monograms, simple shapes, or accent details.
Arrange your cuts like a puzzle – Cricut Design Space's "Attach" feature helps group related pieces together for more efficient cutting. Enable "Snap to Grid" and manually nudge pieces to minimize waste. Multi-project sheets let you cut several designs in one go.
Scrap Project Ideas: Use small pieces for gift tags, phone decals, keychains, or laptop accents. Layer contrasting colors for unique effects. Consider making a "scrap collage" blanket or wall art from accumulated pieces.
Avoid Premium Mistakes
The biggest money waster I see beginners make is using premium vinyl for practice cuts. Use your old scraps or cheap vinyl from a multi-pack for testing designs and placement before cutting your good sheets.
I keep a stash of clearance rack vinyl specifically for prototypes. Test different transfer tape techniques, weeding approaches, and application methods without risking expensive materials. This saves both money and frustration.
Take Care of Your Blades
A dull blade trenches through vinyl instead of cutting cleanly, wasting material. Replace your fine-point blade every 10-20 hours of cutting, and your deep-cut blade even more frequently. Dirty blades are another culprit – remove bits of vinyl buildup regularly.
Clean your mat regularly with a scraper tool – proper adhesion means fewer mis-cuts and less wasted vinyl. A clean mat ensures your cuts release cleanly without tearing. Wash with warm soapy water monthly, and replace when it loses tackiness.
Invest in Quality Tools
Good tools pay for themselves in saved materials. A sharp weeding hook costs $5 but prevents ruined projects. A quality squeegee prevents air bubbles that ruin finished pieces. Transfer tape that actually works saves hours of frustration.
My essential toolkit includes: a metal weeding hook, a soft squeegee, quality transfer tape (I prefer Oracal's), a scraper for mats, and a small brayer for applying vinyl smoothly. These cost under $50 total but dramatically improve results.
Use Vinyl Sheets Strategically
Buy 12x24 inch sheets when possible – they're often the same price as 12x12 sheets but give you double the material. You'll appreciate the extra length for larger projects.
Consider buying by the roll for high-volume projects. Sign vinyl rolls are economical for large signs or multiple identical pieces. Just ensure you have storage space and a way to cut straight edges.
Testing Your Surfaces: A Quick Checklist
Before committing to a full sheet, test a small piece:
- Smooth surfaces: glass, metal, painted walls
- Porous surfaces: unfinished wood or fabric need special prep
- Textured surfaces: might need multiple pressing passes for HTV
- Silicone-coated items: often won't accept adhesive vinyl
Wait 24-48 hours after painting before applying vinyl. Test adhesion in an inconspicuous area first. Some surfaces may need cleaning with rubbing alcohol to remove oils or residues.
Getting Started Without Overwhelm
If you're new to vinyl crafting, start with two basics: a pack of removable vinyl in popular colors and some standard HTV. These cover 80% of beginner projects. Add specialty types as you discover projects that call for them.
Your first project should probably be a simple mug or tote bag – quick results build confidence. Don't start with a complex multi-layer design that could frustrate you into quitting. Master single-color application before attempting complicated layering.
Essential Starter Kit:
- Basic vinyl sampler pack (removable)
- Siser Easyweed HTV sampler
- Standard grip mat
- Weeding hook and scissors
- Transfer tape
Conclusion: Vinyl Crafting Within Your Means
Vinyl crafting should enhance your creativity, not stress your budget. By understanding vinyl types and implementing a few smart shopping strategies, you'll create beautiful projects while keeping money in your pocket for more supplies.
Remember: the best vinyl is the vinyl you actually use. Buy what you need, take care of your tools, and enjoy the creative process. Your home will look amazing, and your wallet will thank you.
Happy crafting! What project are you planning to tackle first with your new vinyl knowledge?
Quick Reference: Vinyl Type Decision Matrix
When in doubt, use this simple guide to choose your vinyl:
- Permanent placement: Oracal 651 or Cricut Premium Permanent
- Temporary/changeable: Oracal 631 or Cricut Removable
- Fabric items: Siser Easyweed HTV
- Full-color designs: Printable vinyl with inkjet printer
- Kid projects: Glitter HTV or glow-in-the-dark for fun factor
Pro tip: Keep a reference card with these recommendations in your craft space – it eliminates decision fatigue when you're ready to create!