Introduction
My first craft fair cost me $140 in booth fees and I sold $118 worth of work. Nine items in seven hours. I packed up under a flickering hall light and did the math in my driveway with the engine still running.
That is not a sob story. After the table I bought, the tablecloth, the bags and the gas, I was down about $95. The lesson cost less than a tank of gas and it rewired how I set up every booth after it.
Here is what I got wrong. My six-foot table sat flat against the back of the space. Every mug, pouch and scarf lived at the same height, about thirty inches off the floor, which is roughly hip level on most adults.
The table also ran the full width of the booth. There was no gap, no corner, no reason for a shopper to step in. People had to stop in the aisle, lean over the front edge and reach. Most of them did not bother.
What follows is the version of that day I wish someone had handed me. Math first, then layout, then the small stuff that decides whether you drive home up or down.
Do the Booth-Fee Math Before You Buy a Single Prop
The booth fee is the smallest number in the equation, and it is the one everybody fixates on. "It's only $95" is how people end up spending $300 to sell $200 of product.
Your real break-even is the sum of four things: the fee, what you spent on display, the material cost of what you're bringing, and the value of your hours. Add them up before the fair, not after.
Say the fee is $150. You spend $70 on a tablecloth, risers and a cash box. You bring $400 of materials at cost. You put in 35 hours of making.
- Fee: $150
- Display: $70
- Materials at cost: $400
- Hours: 35, at whatever your time is worth to you
Before you have sold a single thing, the day owes you $620 plus your labor. If your average sale is $18, you need around 35 transactions just to get back to zero.
That number changes decisions. It tells you whether to bring 40 items or 140. It tells you whether a $150 booth is a reasonable gamble or a hole you're filling with your own money.
The 10x Rule Is a Target, Not a Law
Vendors pass around a rough rule: a booth should gross about ten times its fee. A $150 booth aims for $1,500. A $75 church-hall table aims for $750.
It is a target, not a law. Some categories beat it easily because the price points are high. Some low-priced items never get there no matter how busy the day looks.
What the rule is good for is sizing your inventory. If $1,500 is the target and your average sale is $22, you're looking at about 68 sales. Over six hours, that's eleven sales an hour.
Ask yourself honestly: can my table produce eleven sales an hour? If the answer is no, the booth fee is not your problem. The product mix or the price point is.
Why a $75 Booth and a $350 Booth Are Different Booths
A $75 booth in a school gym is a volume game. Traffic is steady, price points are low, and shoppers are browsing with $20 in mind. One table, three risers and a clear front edge will do the job.
A $350 corner at a juried show is a different animal. The 10x target is $3,500. That demands two tables, an L or U shape, a helper, and enough stock to look abundant at 2 p.m.
Spending $350 on a booth before you have tested your display is the single most common beginner mistake I see. Start where the fee is low enough that a bad day is tuition, not damage.
Layout: Make It Easy to Walk In
A booth is not a shelf. It is a small room with an open door, and shoppers decide in about two seconds whether they're coming in.
The fastest fix is to stop blocking your own entrance. Pull one table back, angle another one, and leave a gap wide enough for a person to step into the space.
The L-Shape and the U-Shape
An L-shape uses two tables at right angles, usually along the back and one side. It creates a corner for you to stand in and an open side for shoppers to enter.
The U-shape adds a third table and wraps the space. It looks generous and holds a lot of stock, but it can trap you in the middle unless you leave one side clearly open.
For a first fair, the L-shape is the safer bet. It fills a 10x10 space without looking thin, and it leaves an obvious entry point that shoppers read without thinking.
If your booth is only six feet wide, skip both. Use one table, set it slightly off-center, and leave the front clear. A small booth with air in it beats a crowded one.
The Front Edge Is Not Storage
The front six inches of your table are the handshake. Keep them low, keep them open, and never stack bins or backstock there.
Shoppers approach what they can reach without leaning. If your front edge is a wall of boxes, they will circle the booth and keep walking, and you will never know why.
Never Sit Behind a Full-Width Table
A full-width table is a counter, and a counter says "transaction." A booth should say "come in." Sitting behind one puts a barrier between you and the only people who matter.
Stand at the corner instead, angled slightly toward the aisle. Not in the aisle, which reads as aggressive. Just at the edge, where you're available but not blocking.
When someone steps in, stay put and let them move. Turning to face them fully is fine. Following them around the table is not.
Display Height: Sell at Eye Level
Flat tables are the default because they're easy, not because they work. Everything at thirty inches means everything is below the natural sightline of an adult standing beside it.
You want three tiers: low, middle and high. The middle band, roughly chest height, does most of the selling because it's where the eye lands without effort.
Risers You Already Own
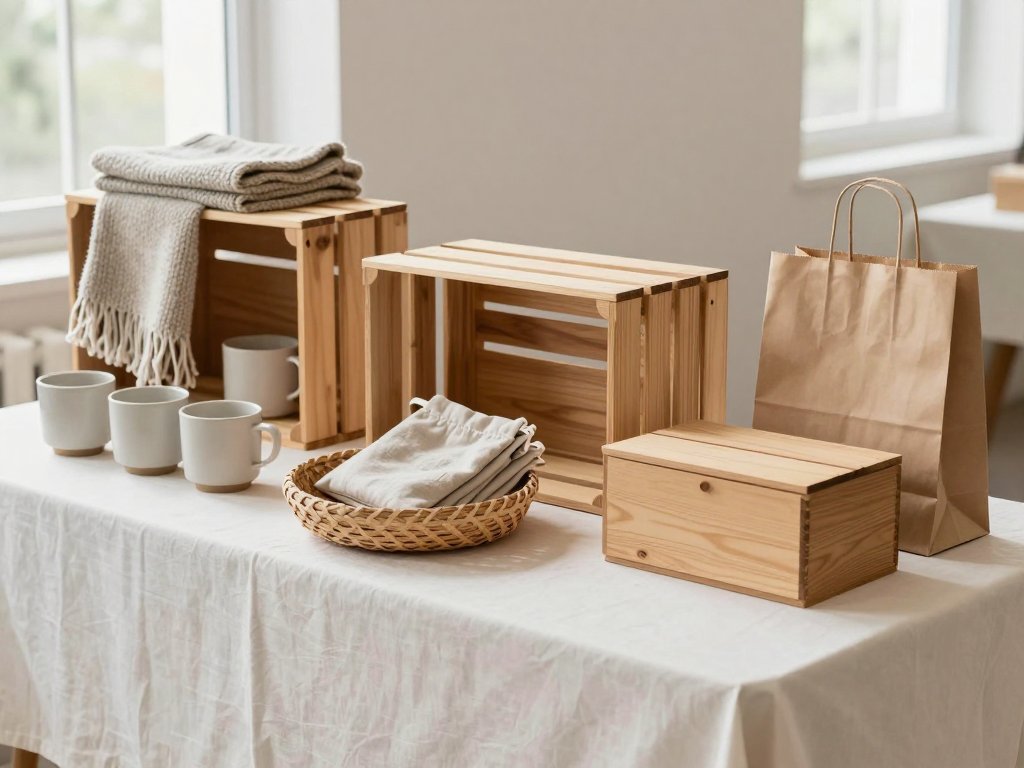
Wooden crates turned on their sides make instant shelves. So do stacked hardcover books, sturdy cardboard boxes under a cloth, and upside-down planters.
A cloth draped over a milk crate hides the crate and creates a clean platform. Two crates and one box can give you three heights for under $20 at a thrift store.
Don't buy display furniture before your second fair. Borrow, thrift, or raid the garage. Nobody has ever walked away from a booth because the riser was a crate.
The Middle Band Does the Work
Put your best-selling, best-margin items in the middle band. That is where hands go first and where the buying decision happens.
Use the top tier for things that read from a distance: a tall vase, a hanging textile, one strong silhouette. It's a flag, not a shelf.
Use the bottom tier for bulk and weight: baskets of small items, stacks of tea towels, anything shoppers are happy to bend down for.
Keep the Small Expensive Things Close
High-theft items are small, light and valuable. Earrings, rings, carved pendants, anything that fits in a pocket.
Keep those within arm's reach of where you stand, on the side nearest you, not at the far end of the table. It's not paranoia. It's just easier to greet someone and watch a tray at the same time.
What Goes Where
Once the shape is right, the question becomes what fills it. Most beginners try to show everything. Shoppers read that as clutter and buy nothing.
One Hero Item, One Place
Pick one piece as the hero: your most striking, most photographed, most expensive work. Give it its own space with nothing crowding it.
The hero is not there to sell on day one. It sets the price expectation for everything around it and gives people a reason to stop walking.
Group by Price or by Family, Not Both
You have two honest options. Group by product family, so all the mugs sit together and all the pouches sit together. Or group by price, so everything under $15 lives in one zone.
Pick one and commit. Mixing the two systems creates corners where a $9 item sits next to a $70 one with no logic, and shoppers quietly lose confidence in your pricing.
Family grouping works better when your range is wide. Price grouping works better when you have a lot of small, similar items and want quick decisions.
The Bargain Basket
Keep one shallow basket near the front with items priced low and marked clearly. Seconds, samples, small extras, last season's colorway.
It gives shy shoppers a low-risk way to start a conversation with you. A $6 purchase today is often a $40 purchase at the next fair.
Demonstrate Something
If any part of your craft can be done at the booth, do it. A small work-in-progress pulls people in better than any arrangement of finished goods.
You don't need a full workshop. A lap loom, a half-finished carving, or a spool of wire and pliers is enough. It gives people permission to stop and watch.
It also answers the question every maker hears: "Did you make this?" Watching you do it answers before you have to.
Signage and Pricing Without a Design Degree
Bad signage is worse than no signage. Ten handwritten cards in six different styles tells a shopper that nobody is in charge here.
One Card Style, Everything Priced
Choose one card size, one paper color and one pen. Same shape, same place in front of each item, every time.
Price everything. Not "ask me," not "$12 and up." An unpriced item makes people guess, and people who guess usually guess wrong and walk away.
Round Numbers and One Price List
Round numbers move faster. $12 is easier to decide on than $11.50, and the difference in your margin is not worth the friction.
Keep one simple price list at the front of the table for anything you have many of. Ten seconds of scanning beats twenty small cards competing for attention.
One Booth Sign, Not Ten
You get one sign. A single readable board with your name, what you make, and your card reader or payment note if you need one.
That's it. Resist the urge to explain your process, your materials and your inspiration across four laminated posters. Nobody reads them at a fair.
Cheap Cards That Don't Look Cheap
Buy a pack of kraft cardstock and cut it into rectangles. Write in white gel pen or fine black marker, and keep your handwriting consistent.
If your handwriting is rough, print a single sheet of prices at the library for about fifteen cents and cut them apart. Same style, no design software, under $5 total.
Taking Money Without Losing It
The sale is the moment your booth either feels professional or feels like a friend's kitchen table. Small fumbles here cost real money.
The Card Reader Needs a Home
Don't balance a card reader on a stack of inventory. Mount it, clip it, or set it on a stable block at the edge of the table where you stand.
Test the connection before the doors open. Hall wifi is unreliable, so know whether your reader runs on cellular and whether that signal works inside a concrete building.
Your Change Float
Start with about $70 in small bills and coin: two $10 bills, four $5 bills, twenty $1 bills, and a roll of quarters.
Keep it in a plain cash box under the table, not in a tin on display. Take the box home with you at the end, every time, even if it's empty.
The Sales Log
Keep a lined notebook and write down what sells, in what color, at what price, and roughly when. Four columns, five seconds per sale.
This is the difference between guessing what to restock and knowing. By your third fair, the log tells you which 20 percent of your inventory is doing 80 percent of the work.
Phone Battery and the Rest
Bring a charged power bank and a charging cable. A dead phone means no card payments, and card payments are most of your sales now.
Bring a small bag for trash, a bottle of water, and a snack you can eat standing up. You will not get a real break.
Packing, Loading and Setup Morning
Setup is where first-timers lose an hour and their calm. The fix is boring and it works: tubs, labels, and a checklist written before you leave the house.
Tubs With Labels
Use clear lidded tubs, one per type — risers, textiles, ceramics, signage and cash, tools and tape. Write on each lid with a marker.
Pack in the order you'll unpack. Risers and cloth go in last so they come out first. Nothing is more demoralizing than digging for a tablecloth while shoppers arrive.
Arrive Early Enough to Be Bored
Plan to arrive ninety minutes before the doors open, even if the organizer says an hour. You want ten minutes at the end where there's nothing left to do but wait.
That buffer absorbs the missing table, the wrong spot, the tent that won't go up, and the card reader that suddenly needs an update.
Wind, Weights and Outdoor Booths
If you're outdoors under a canopy, weight every leg. Forty pounds per leg is a reasonable target, sandbags or water jugs or concrete blocks.
A canopy without weights is a sail. I have watched one lift and land on a neighboring booth, and the vendor lost more than the booth fee that afternoon.
Also clip your tablecloth or tape it down, and keep light items from sitting on the top tier where a gust can take them.
The Cart and the Helper
A folding hand truck pays for itself the first time you park far away. So does a second person, even an unpaid one, for the load-in and the bathroom breaks.
If you're solo, do two trips and don't try to be a hero. Most fair venues have a loading window, and it's usually shorter than you think.
A Realistic First-Time Display Budget
You can set up a booth that looks intentional for $100 to $200. That range assumes you're borrowing the table and buying the rest carefully.
- Folding table: $0 if borrowed, $40 to $60 if bought
- Floor-length tablecloth, two: $15 to $25
- Crates, boxes and risers: $0 to $30, thrifted
- Price cards, booth sign and marker: $10 to $20
- Plain cash box: $10 to $15
- Card reader mount or stand: $10 to $15
- Clear tubs and labels: $10 to $15
- Hand truck or dolly: $0 if borrowed, $30 to $40 if bought
- Canopy weights, outdoor only: $10 to $20
Add a $70 change float, but don't count it as spending. It comes home with you unless the day goes badly.
Borrowed and thrifted props are not a compromise. A crate from the garage and a cloth from the linen closet read exactly the same as a display system when the table is styled properly.
After the Fair: Count, Note, Decide
Do the numbers the same night, before the relief wears off and your memory starts rounding up.
Total your gross sales, subtract the fee, the display spend and the materials you actually sold, and write down the honest net. Then note what sold out and what didn't move at all.
Sold-out items tell you what to make more of. Dead stock tells you either the price was wrong, the placement was wrong, or the product doesn't fit this market.
Then decide about rebooking. If you cleared your fee and learned two useful things, that's a yes. If you lost money on a layout problem you now know how to fix, that's also a yes.
One fair is a test, not a verdict. Almost nobody's first booth is their best one, and the vendors who look effortless have simply paid for more afternoons like your first.
Fix one thing next time. The entrance, or the heights, or the pricing. One change per fair is how a table becomes a booth, and a hobby becomes something that pays for itself.