Introduction
Chibi drawings look like they took five minutes. That is exactly what makes them so frustrating to try.
You draw a big round head, add a small body, and somehow the result looks like a bobblehead instead of a character.
The problem is almost never talent. It is placement. Chibi has its own set of rules, and they are not the rules you learned from drawing realistic people.
Once you know where the eyes sit, how tall the body should be, and how much detail to leave out, the style clicks quickly.
This guide walks you through it in order: proportions, supplies, shapes, the face, hair, hands, inking, and colour.
There are three practice projects at the end, and every one of them fits on a single sketchbook page.
No art school, no expensive set, no perfect first try. Just a pencil and a quiet twenty minutes.
What Makes a Character Chibi, Exactly?
The word comes from Japanese slang for something small and cute. Figure collectors call the same style "super-deformed."
In practice, chibi is a proportion system. You measure a character in heads, and the count decides how cute they read.
A realistic anime figure runs about six to seven heads tall. A fashion illustration can stretch to eight.
A chibi runs two to three heads tall in total, so the head takes up a third to a half of the whole character.
- Body one head tall (1:1). The body is roughly the size of the head, giving a two-head figure. Very cute, very toy-like, best for stickers and mascots.
- One and a half heads (1:1.5). A little more room for a torso and legs. Good for standing figures.
- Body two heads tall (1:2). The most flexible version. You can show a pose, a skirt, a bag, and still keep the cute read.
Why does this ratio feel cute rather than strange? Because it exaggerates what babies look like.
Human infants have large heads, small chins, low-set eyes, and short round limbs. Our brains read those signals as harmless and lovable.
Chibi turns that dial up until it becomes a design choice rather than a fact of age. The character can be a grown warrior and still read as adorable.
That is the whole trick. You are not drawing a small person. You are drawing a symbol of a person.
When did you last draw something just because it was fun, with no plan to show anyone? Keep that question nearby. It is the right mood for this.
Supplies That Actually Matter
You can draw chibi with almost nothing. Here is the short list that genuinely earns its place on the table.
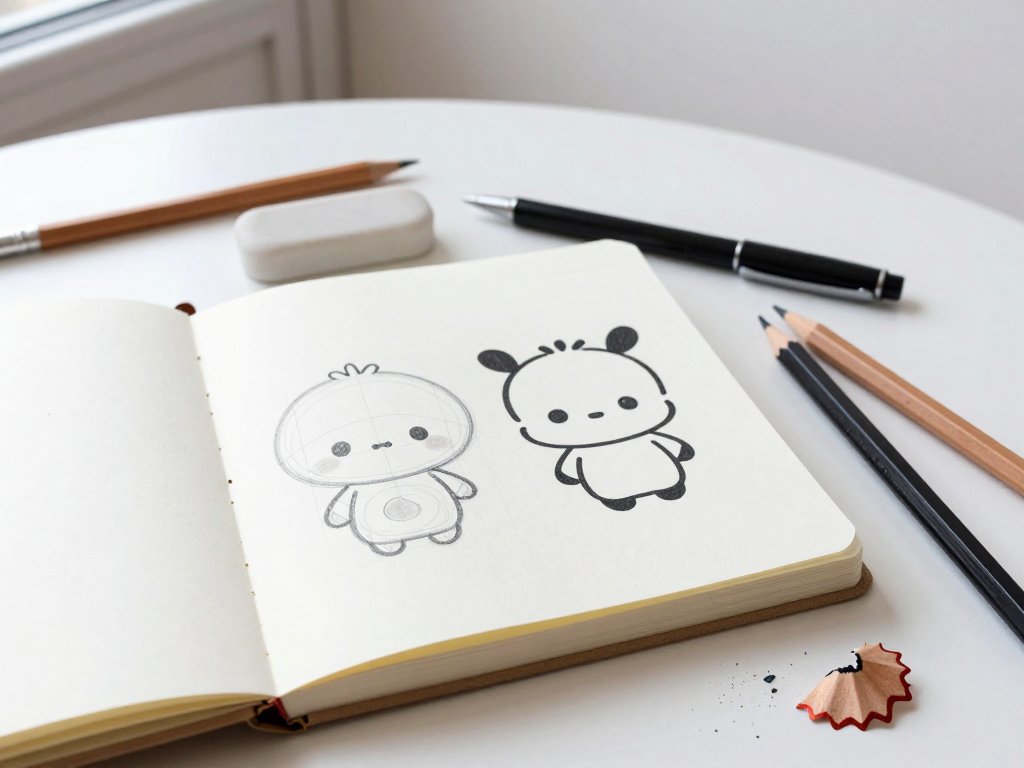
- A plain sketchbook. Smooth paper, around A5 or A4. Smooth matters, because tiny features and clean ink lines need a surface that does not fight back.
- A soft pencil. One that makes a light grey line you can erase without ghosts. Hard pencils dent the paper and leave grooves that show up later.
- An eraser. A white vinyl eraser for clean lifts, plus a kneaded eraser if you already have one for dabbing without smearing.
- A fine black pen. Waterproof and fine-tipped, for inking the lines you want to keep. This is the step that makes a sketch look finished.
- Coloured pencils or markers. Either works. Pencils are more forgiving and easier to layer. Markers are faster and give flatter, bolder colour.
That is the kit. Five items, and none of them need to be expensive.
What can you skip? Blending stumps, full 72-colour sets, tracing paper, special chibi templates, and expensive brush pens.
None of those will improve your first twenty characters. A cheap pencil you actually use beats a beautiful set you are afraid to open.
One more thing worth having: a scrap sheet beside the sketchbook for testing pen pressure and colour before it touches your drawing.
Start With Three Shapes
Chibi is built from a circle, a bean, and a few lines. Set those down first and the rest is decoration.
Do not draw outlines yet. Think of this stage as scaffolding, drawn light enough to disappear later.
- Draw the head circle. Slightly wider than it is tall, like a squashed ball. A perfect circle reads stiff.
- Mark the center line. A light vertical curve down the middle of the circle. This is where the nose and mouth line up.
- Mark the eye line low. A gentle horizontal curve about two-thirds down the circle. We will come back to this.
- Add the body. A rounded rectangle or a kidney bean, about two-thirds the width of the head. For a first attempt, make it the same height as the head.
- Attach the limbs. Single lines for arms and legs, with a small bend at the elbow or knee. No muscles, no joints.
- Add a neck stub. Two short vertical lines, or none at all. Many chibi characters have the head sitting almost directly on the shoulders.
Step back and look at the silhouette from arm's length. If you cannot tell what the character is doing, fix that now, before any detail goes in.
The silhouette is the drawing. Everything after this point is just explaining it.
Keep the shapes loose. If the head comes out oval, that is fine. Chibi tolerates wonkiness far better than realism does.
Place the Face Low on the Head
This is the single biggest beginner mistake, and it is worth its own section.
Most people instinctively put the eyes in the middle of the face. On a real adult head, that is roughly correct.
On a chibi, it destroys the effect. The eyes need to sit around the lower third of the head, sometimes lower.
That leaves a big, smooth forehead above them. The forehead is doing most of the cute work, and it needs the space.
Here is a reliable way to find the spot. Divide the head circle into thirds with two light horizontal curves.
The eye line sits on the lower third line. The mouth sits just below it, and the chin gets only a sliver of room.
The nose goes between the eyes and the mouth, usually no more than a small dot or a tiny angled mark.
Notice what disappears: cheekbones, jaw corners, a defined chin, the long space between nose and lip.
All of that gets compressed. The face becomes eyes, then a very short journey to the chin.
Try it side by side. Draw one head with the eyes in the middle, then the same head with the eyes low.
The second one will look younger, softer, and unmistakably chibi. Same lines, different address.
Eyes, Brows, and the Tiny Nose and Mouth
Chibi eyes are large, simple, and expressive. They carry almost all of the character's personality.
Draw each eye as a tall oval or a rounded almond. Leave roughly one eye width between them.
Give the top lid a heavier line. That single thick curve reads as lashes and adds instant depth.
Fill the iris with a dark shape, then leave one small white dot near the top or side.
That dot is the whole difference between glassy and alive. One per eye is enough; more looks wet.
Now the useful part. Small changes to the eye shape change the entire mood.
- Happy. The lower lid curves upward into a soft arc. The eye looks like a smile.
- Sleepy. The upper lid drops low and flat, hiding half the iris. Relax the brows.
- Surprised. Both eyes open into near-circles with small pupils. Brows jump high.
- Grumpy. The upper lid slants down toward the nose. Brows sit low and angle inward.
Brows do the rest. A generous gap above the eyes reads open and friendly; a tight gap reads intense or annoyed.
Because chibi brows are often just short dashes, you can move them a long way without breaking the face.
The nose is optional. A dot, a tiny "v", or a single short curve is plenty. Some artists leave it out entirely.
The mouth is a single line, roughly a sixth of the head width. Up for happy, flat for unimpressed, an oval for surprise.
Keep the mouth small. A wide realistic mouth on a chibi face looks like a different art style pasted on.
Draw the eyes first, then the brows, then the mouth. In that order you can see the expression building instead of guessing.
Hair as Shapes, Not Strands
Hair is where beginners overwork a drawing. Individual strands are the enemy here.
Think of chibi hair as four to six large shapes sitting on the skull, like a helmet made of soft ribbons.
Start with the skull line, then draw the hair slightly outside it. Hair has volume; it does not cling.
- Fringe. Two or three wedge shapes across the forehead, overlapping slightly. Leave gaps between them.
- Side locks. Two soft shapes framing the cheeks. These make the face look held rather than floating.
- Back mass. One big rounded shape behind the head, wider at the bottom.
- Accent spike. One small tuft that breaks the outline, usually at the crown or the side.
That accent spike matters more than it looks. One deliberate break in the silhouette stops the hair reading as a solid lump.
Draw the clumps with pointed tips and rounded bodies, like leaves or flames. Never draw them as parallel lines.
Where hair meets skin, use a crisp edge. Where two clumps overlap, let one cross the other with a small notch.
If your character looks bald under the hair, you have drawn the hair too thin. Widen it by a few millimetres all round.
Hair is also the fastest way to make two characters look different, so change the shape before you change the colour.
Hands and Feet: Mittens and Ovals
At chibi scale, fingers become noise. Simplify them and the drawing instantly looks more professional.
Draw the hand as a small mitten: a rounded paddle with a thumb bump on one side.
That is it. No knuckle lines, no separated fingers, no fingernails.
If the hand is relaxed and open, make the mitten slightly wider at the top. If it is gripping something, curl the top edge into a soft C.
Hands should be small. A chibi hand is roughly the size of one eye, sometimes smaller.
Feet work the same way. A small oval for a bare foot, or a rounded shoe shape with a flat sole.
Point the toes in the direction the character is facing. Two parallel ovals look like they are standing to attention.
For a seated figure, fold the legs into two soft curves and let the feet turn inward. It reads cozy without any anatomy.
Resist the urge to add detail just because you can see the space. Empty mitten hands look intentional. Careful five-finger hands at this size look crowded.
Inking and Clean-Up
Inking is what separates a sketch from a drawing. It also freezes your decisions, so do it last.
Before you start, test the pen on scrap paper. You want a line that flows without skipping and does not bleed into the paper fibres.
Then ink slowly and deliberately. Speed gives you confidence, but chibi lines are short, so control matters more.
Draw each line in one pass where you can. A line made of small hesitant strokes looks furry.
Vary the weight. Use a slightly heavier line on the outer silhouette and lighter lines inside the face.
- Heaviest: the outline of the head, body, and hair mass.
- Medium: the eyes, the mouth line, and where shapes overlap.
- Lightest: interior details like hair strands and fabric folds.
That hierarchy is what makes a flat drawing look like it has depth. Your eye reads the thick edges as closer.
Now wait. Let the ink dry properly, at least a minute, before the eraser comes out.
Erase gently in one direction rather than scrubbing in circles. Lift the paper with your other hand so it does not crease.
Brush the crumbs away with the edge of your hand, not your palm, or you will smear graphite across fresh ink.
If a line went wrong, do not panic. A small correction line drawn confidently reads as style, not error.
Colour: Three Colours and One Shade
Chibi art rewards restraint. Three or four colours per character is usually the right amount.
Pick one colour for hair, one for the main garment, one for skin, and one accent for a ribbon, bag, or shoe.
Keep skin and hair clearly different in value. Pale hair with pale skin turns into mush at small size.
If both are light, darken the hair. If both are dark, lighten the skin. Contrast does more work than any shading technique.
Shade with one darker tone, not a blend. Choose a version of your base colour a few steps deeper, then place it deliberately.
- Under the chin and along the jaw.
- Under the fringe, across the top of the forehead.
- Where the arm meets the body, and inside the legs.
- A soft patch on the ground beneath the feet.
That is enough. Chibi shading is about suggesting form, not describing it.
Leave the whites of the eyes and the highlight dots completely clear of colour. Clean whites make the face pop.
With markers, work from light to dark and let each layer dry. With pencils, use light circular pressure and build slowly.
Test every colour on the margin first. A marker that looks dusty pink in the cap can turn bright coral on paper.
Common Beginner Mistakes, and the Fix
These five problems show up in almost every first chibi sketch. Each has a quick correction.
- Tiny eyes. Beginners draw eyes at realistic scale. Fix: make each eye roughly a quarter of the head width, then check the gap between them.
- A long torso. The body creeps up to three or four heads. Fix: measure your head circle with a finger and keep the body to one head or less.
- Over-detailed hair. Dozens of thin strands read as scribble. Fix: redraw as four to six big clumps with one accent spike.
- Features too high. Eyes drift toward the middle of the face. Fix: redraw the eye line at the lower third, every single time, before adding features.
- Noodle limbs. Arms with no bend look like string. Fix: add one clear elbow angle and slightly thicker upper arms.
Two more worth watching. Drawing the outline first instead of the shapes, which locks in every error.
And using too many colours at once, which flattens the character instead of enriching it.
If a drawing feels wrong but you cannot name why, check the eye line, then the head-to-body ratio. Those two solve most of it.
Three Practice Projects
Each project uses one page and one sitting. Do them in order if you can, because each one teaches a different skill.
Project One: A Standing Full-Body Chibi
This is the foundation. Twenty minutes, one character, no background.
- Draw the head circle, then mark the eye line at the lower third.
- Block in a body one head tall and two-thirds the head width.
- Add straight limbs with a small elbow and knee bend, hands as mittens, feet as ovals.
- Place the eyes, brows, dot nose, and a small mouth.
- Draw the hair as four or five large clumps with one accent spike.
- Ink the silhouette, wait, erase the pencil, then colour with three colours and one shade.
The goal is not a perfect figure. The goal is finishing the whole sequence once so the order becomes automatic.
Project Two: A Bust Portrait
Here you crop in close, so the face gets all the attention.
Draw a large head that fills most of the page, with the shoulders running off the bottom edge.
Because the head is bigger, you can spend more care on the eyes: the heavy top lid, the iris, the single highlight dot.
Give the hair more overlap at this scale, with the fringe crossing the side locks.
Try one strong expression, like sleepy or mildly unimpressed. Small features carry big moods when they are this close.
This project is also the best place to test a new colour combination before committing it to a full figure.
Project Three: Two Friends
Two characters on one page teaches you spacing, and it is genuinely more fun than drawing alone.
- Draw two head circles at slightly different heights. One taller, one smaller.
- Overlap the bodies a little, so one shoulder sits in front of the other.
- Give each character a different hair shape: one spiky, one rounded.
- Colour them with different palettes but a shared accent colour, so they look like they belong together.
- Add one shared prop between them, like a bag strap or a pair of drinks, to connect the composition.
Overlapping is the key. Two figures side by side with a gap between them look like a chart; two figures touching look like a relationship.
Which of these three feels like the one you would actually finish this week? Start there and let the others wait.
One Character a Day
The fastest way to improve is not a long weekend session. It is one small drawing, most days.
Pick a cheap sketchbook you are not precious about. Date the corner of each page.
Draw a single chibi. Same process each time: circle, eye line low, tiny body, four hair clumps, ink, three colours.
Some will be stiff. Some will have a head that leans. That is normal and it is not a signal to stop.
Around page thirty, something shifts. Your hand starts placing the eye line before you think about it.
Flip back to page one and you will see it plainly. The improvement is usually bigger than it feels day to day.
A chibi takes about ten minutes. That is one cup of tea, or the length of a school pick-up queue.
So open the sketchbook tonight and draw one round head with the eyes set low. Then draw the body. Then stop.
Tomorrow you will do the same thing a little more confidently. That is the entire method, and it works.
If you would rather nail real proportions before flattening them, our grid method guide is a natural companion to this one.
Happy sketching!