Introduction
There is something quietly magical about shaping a simple lump of clay into something beautiful with your own hands.
Air dry clay, in particular, offers that satisfaction without the commitment of a kiln or the mess of traditional pottery.
As a busy parent, you already know how rare it is to find a creative outlet that fits into the margins of your day — between carpool runs, meal prep, and the endless laundry cycle.
Air dry clay is exactly that kind of forgiving medium. It requires no special equipment, no firing, and no toxic chemicals.
You mix, shape, and let nature do the rest. The results are surprisingly refined: smooth, matte finished pieces that look like artisan pottery but cost pennies to make.
And because it dries at room temperature, you can work on your projects in short bursts — a few minutes here, a half hour there — without ever feeling rushed.
This summer, why not fill your home with handmade decor that captures the season's light, airy spirit?
From delicate botanical bowls to textured coasters that anchor your lemonade afternoons, these air dry clay projects are designed for beginners and experienced crafters alike.
Each one can be completed in an afternoon, with materials you can find at your local craft store or order online.
Understanding Air Dry Clay: What Makes It Special
Before diving into projects, let us take a moment to understand the material itself. Air dry clay is a water-based modeling compound that hardens as moisture evaporates into the air.
Unlike polymer clay, which requires baking in an oven, or earthenware, which demands a kiln firing, air dry clay cures naturally over 24 to 72 hours depending on thickness and humidity.
There are several types available, and choosing the right one makes a noticeable difference in your finished pieces.
Traditional paper clay contains cellulose fibers that give it a lightweight, slightly fibrous texture — ideal for sculptural projects and adding fine details.
Stoneware-style air dry clay is denser and heavier, producing pieces with a smoother, more polished surface.
White air dry clay is the most common variety and takes paint beautifully, while terracotta tones offer a warm, earthy look straight out of the package.
Most brands on the market today are non-toxic and safe for use around children, though younger kids should always be supervised.
Popular options include Crayola Air Dry Clay for family projects, DAS for detailed sculpting, and Creative Paperclay for fine art pieces.
Each has a slightly different drying time and texture, so it is worth experimenting to find your favorite.
One characteristic that surprises many beginners is shrinkage. As the clay dries and water evaporates, the piece contracts by roughly 10 to 15 percent.
This means a coaster that measures four inches across when you form it will end up closer to three and a half inches once fully cured.
Plan your projects with this shrinkage in mind, especially if you are working on pieces that need to fit specific dimensions.
Essential Tools and Materials
One of the great appeals of air dry clay is its minimal barrier to entry. You probably already own most of the tools you need. Here is what to gather before you begin your first project.
For rolling and shaping, a simple rolling pin or a smooth glass bottle works beautifully to flatten your clay to an even thickness.
Two wooden craft sticks placed on either side of your clay act as thickness guides, ensuring consistent depth across your piece.
A sharp craft knife or clay blade is essential for clean cuts, while cookie cutters in your choice of shapes make quick work of uniform designs.
Texturing tools add personality to your pieces. Before you rush out to buy specialty clay tools, look around your kitchen and craft space.
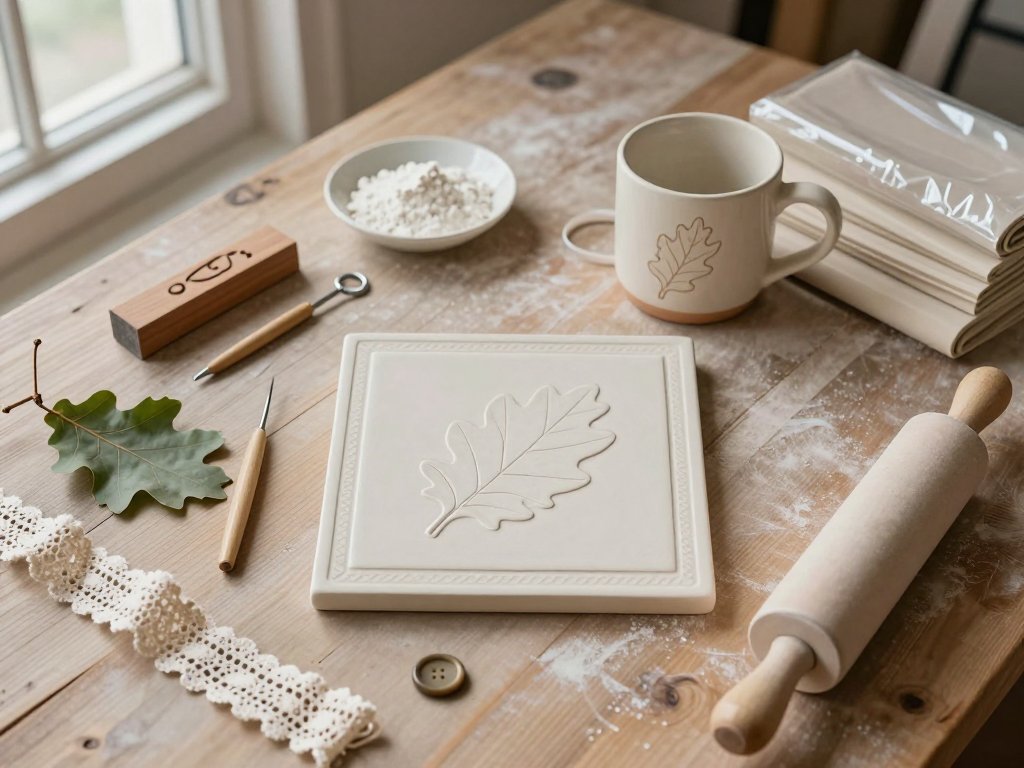
Buttons, lace, leaves, textured fabric, and even the tines of a fork can create beautiful surface patterns.
A toothpick or skewer is invaluable for poking holes, drawing fine lines, and making hanging holes for ornaments and wall art.
For finishing, you will want fine-grit sandpaper (220 grit or higher) for smoothing edges after drying, acrylic craft paints for adding color, and a clear acrylic sealer or matte varnish to protect your finished pieces.
A small bowl of water is also handy for moistening your fingers as you work — this helps smooth seams and blend clay pieces together.
Finally, protect your work surface with a silicone mat, a piece of parchment paper, or a smooth ceramic tile. Air dry clay can stick to porous surfaces as it dries, and you will thank yourself later for laying down a barrier.
Project 1: Botanical Impression Coasters
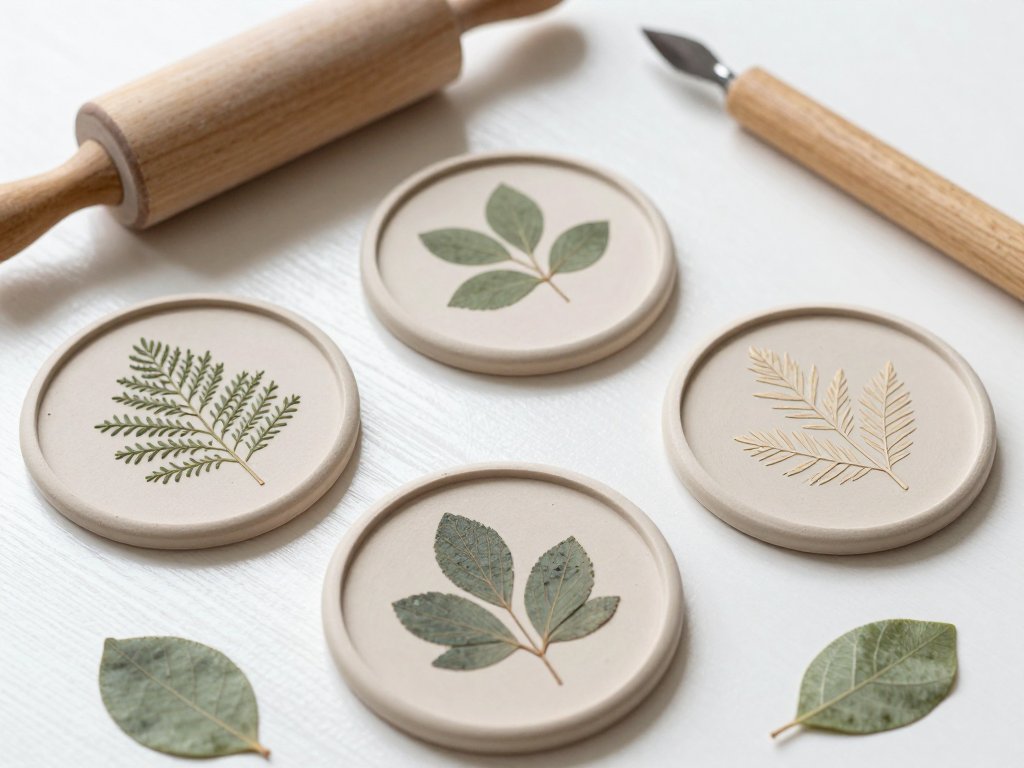
These charming coasters capture the delicate beauty of summer leaves and flowers in a functional piece that protects your tables in style. They make wonderful hostess gifts and can be customized with foliage from your own garden.
Begin by rolling your clay to an even thickness of about a quarter inch. Using your thickness guides will ensure all four coasters are uniform.
Cut your clay into squares, circles, or organic freeform shapes — there is no wrong choice here.
For a set of four, aim for each piece to be about four inches across before drying, which will give you roughly three and a half inch finished coasters.
Now comes the creative part. Select fresh leaves or sturdy flower petals from your garden or a neighborhood walk.
Look for varieties with pronounced veins and interesting shapes — fern fronds, mint leaves, rose petals, and hydrangea blossoms all yield beautiful results.
Gently press each leaf into the clay surface with a rolling motion, using even pressure to transfer every vein and texture line.
Peel the leaf away carefully to reveal the impression.
Use a toothpick or skewer to poke small holes in the corners if you would like to string the coasters together for storage.
Allow the clay to dry completely, which typically takes 24 to 48 hours depending on humidity and thickness.
Rotate the coasters once after the first day to ensure even drying on both sides.
Once fully dry, lightly sand any rough edges with fine-grit sandpaper. Paint the coasters if desired — soft watercolor washes or muted earth tones complement the botanical theme beautifully.
You might leave some coasters natural and paint others for variety within the set. Seal with a matte varnish to protect against moisture, though remember that air dry clay is not fully waterproof, so these coasters work best with cold drinks and should be wiped rather than soaked.
Place them on your coffee table or dining table and watch guests pick them up to admire the leaf impressions. They are conversation starters as much as functional decor.
Project 2: Textured Shell and Sand Dishes
Summer is synonymous with beach days, and these textured dishes bring a piece of the shoreline onto your vanity or entryway table. Use them to hold jewelry, keys, loose change, or small treasures collected during family outings.
Start by rolling your clay to a quarter-inch thickness. Cut a freeform oval or organic shape that mimics a sea-smoothed stone — irregular edges add to the natural aesthetic.
Gently drape the clay over the bottom of a small bowl or your upturned palm to create a shallow dish shape.
The clay should curve upward at the edges to form a gentle lip.
Now for the texture. Press actual seashells, sea glass, coarse sand, or small pebbles into the surface.
The rough textures create visual depth and tactile interest. If you are using sand, sprinkle it over the damp clay and press it in gently with your fingers or a rolling pin.
Brush away the excess to reveal an embedded sand pattern that feels delightfully gritty to the touch.
For a more sculptural approach, roll tiny coils of clay and arrange them into shell-like spirals on the dish's surface. Or use the edge of a real scallop shell to stamp repeating patterns around the rim. The possibilities are limited only by what you find on your next beach walk.
Dry thoroughly, then sand any sharp edges. These dishes look stunning in natural white clay or painted in soft coastal blues, seafoam greens, and warm sand tones.
A satin finish sealer preserves the texture without making it glossy. Place one by the front door for keys and another on your bathroom vanity for rings and earrings.
Project 3: Minimalist Geometric Wall Art
Modern, airy, and endlessly customizable, geometric wall art made from air dry clay brings an artisan touch to empty walls.
This project is particularly satisfying because it feels like a grown-up craft — the kind of decor you would find in a boutique home goods store for thirty dollars a piece.
Roll your clay to a uniform quarter-inch thickness. Use a craft knife to cut geometric shapes: diamonds, triangles, circles, hexagons, and organic teardrops.
A protractor or angled ruler helps with precise angles if you are aiming for a more structured look, but freehand cutting produces lovely imperfect forms that feel handcrafted.
Before drying, poke two small holes near the top of each piece for hanging. A tiny straw or the tip of a skewer creates clean holes that will not tear the clay.
You can also embed small self-adhesive disc magnets into the back of each piece before drying if you prefer a magnetic arrangement.
Allow the shapes to dry flat on a non-stick surface. This can take two to three days for thicker pieces.
Flip them gently after 24 hours to promote even drying. If a piece warps slightly during drying, place a light, flat weight on top for the remaining drying period to encourage it to flatten back out.
Once dry, sand the edges and surfaces until they feel silky smooth. Paint each shape in a curated color palette — think muted blush, dusty sage, warm terracotta, and creamy white. You could also leave some pieces natural and paint others, creating a balanced mix of textures and tones.
String the shapes on thin twine, clear fishing line, or fine wire to create a hanging mobile or a fixed wall arrangement.
Arrange them on a branch for a sculptural mobile, or mount them directly to the wall with small adhesive hooks for a permanent composition.
The shadows these shapes cast as light moves across them become part of the art itself.
Project 4: Herb Garden Plant Markers
For those who tend summer herb gardens, these handmade plant markers add charm to every pot and raised bed. They are quick to make, highly practical, and a wonderful way to involve children in the garden.
Roll small amounts of clay into rectangles roughly two inches tall and one inch wide, about an eighth of an inch thick.
You want the markers to be sturdy enough to withstand weather but thin enough to dry quickly.
Cut one end into a gentle point or arrow shape, which will be the end that goes into the soil.
Before the clay dries, use a toothpick or skewer to write the name of each herb in the surface.
Print legibly and press deeply enough that the letters remain visible after drying and sealing.
Options include basil, rosemary, thyme, mint, oregano, chives, sage, and lavender. You can also add small decorative impressions — a tiny leaf shape next to each name, or a border of dots around the edge.
These small pieces will dry in about 24 hours. Once fully cured, sand any rough spots and seal with a weather-resistant acrylic sealer.
While air dry clay is not completely waterproof, a good sealer applied in two coats provides adequate protection for outdoor use through a growing season.
Bring the markers indoors during winter months to preserve them.
Paint the letters in a contrasting color so they are easy to read from standing height.
White paint on natural clay or dark green paint on white clay both look charming.
These markers make thoughtful garden-themed gifts when tied together with a bit of garden twine and accompanied by a packet of seeds.
Project 5: Candle Holders and Tealight Dishes
The warm, flickering glow of candlelight takes on a special quality when the holder itself is handmade. These simple tealight dishes and small candle holders create atmosphere for summer evenings on the patio or cozy dinners indoors.
For tealight dishes, roll your clay to a quarter-inch thickness and cut circles roughly three inches in diameter.
Use a smaller cutter or the rim of a shot glass to press a shallow indentation in the center, creating a nest for the tealight.
The indentation should be just deep enough to hold the candle securely without submerging it.
For pillar candle holders, roll a thick coil of clay and form it into a spiral base, building it upward in layers to create a textured, sculptural holder.
Alternatively, roll a flat rectangle and curve it into a cylinder, sealing the seam with water-slicked fingers.
The open top should be slightly wider than your candle to allow for the clay's shrinkage during drying.
Texture and embellish the surface as you wish. Botanical impressions, carved lines, or pressed patterns all work beautifully. Keep in mind that candle holders will be near open flame, so the clay base must be stable and the candle should fit snugly without wobbling.
After thorough drying and sanding, seal the holders with a matte or satin varnish. Use only LED tealights or votive candles in air dry clay holders — the clay itself is not heat resistant, and real flames could damage the piece over time.
This is a safety consideration worth sharing with anyone who receives one as a gift.
Group several tealight dishes on a wooden tray with scattered dried flowers for a centerpiece that guests will admire. The handmade quality of these pieces adds warmth that no store-bought candle holder can replicate.
Finishing and Sealing Your Pieces
The finishing stage is where good projects become beautiful ones. Proper sanding, painting, and sealing elevate your air dry clay creations from homemade to heirloom quality.
Begin with sanding once the piece is completely dry — no cooler spots or flexibility remaining.
Start with medium-grit sandpaper (around 220 grit) to remove major imperfections, then progress to finer grits (400 grit and above) for a silky surface.
Sand in a well-ventilated area or outdoors, as the clay dust can be fine and pervasive.
A dust mask is recommended for larger projects.
Wipe away all dust with a damp cloth before painting. Acrylic craft paints adhere beautifully to air dry clay.
Thin your paints with a little water for translucent washes that let the clay's natural texture show through, or apply full-strength paint for opaque, bold color.
Let each coat dry completely before adding the next.
For a more sophisticated finish, consider using metallic waxes or gilding creams on raised textures.
Rub the wax over the surface and wipe it away with a soft cloth — the wax catches in the recessed areas, creating beautiful depth and contrast.
This technique works especially well on botanical impression pieces and textured geometric shapes.
Sealing is the final step and one you should not skip. A clear acrylic sealer in spray or brush-on form protects your work from dust, moisture, and UV fading.
Spray sealers provide a more even coat with fewer brush marks. Apply two thin coats, allowing each to dry thoroughly between applications.
Choose a matte finish for a natural stone look, satin for a subtle sheen, or gloss for a shiny, ceramic-like surface.
Troubleshooting Common Issues
Even experienced clay artists encounter challenges, and knowing how to handle them keeps frustration at bay.
Cracking is the most common issue with air dry clay and usually happens when the piece dries too quickly.
Slow drying by covering the piece loosely with plastic wrap or a damp cloth for the first 24 hours, then uncovering it gradually.
Small surface cracks can be filled with fresh clay mixed with a drop of water, smoothed over the crack, and allowed to dry.
Warping occurs when pieces dry unevenly. Flip flat pieces regularly during the drying period, and ensure that both sides are exposed to air.
For bowls and dishes, drying them upside down on a soft cloth helps maintain the curve.
If a piece warps despite your best efforts, embrace the imperfection — gentle curves often add organic character to handmade items.
Bubbles and air pockets appear when clay is not thoroughly kneaded before use. Spend a few extra minutes wedging your clay — pressing and folding it repeatedly — to eliminate trapped air.
If a bubble appears on the surface of a dried piece, sand through it and fill the resulting divot with fresh clay paste.
White residue or powder on the surface after drying is simply dried clay dust and washes away easily with a damp cloth. If it persists, a light sanding followed by sealing will resolve the issue permanently.
Conclusion
Air dry clay is one of those rare craft materials that rewards patience and welcomes imperfection.
Every piece you make will be unique, bearing the subtle marks of your hands and the quiet attention you gave it.
Summer is the perfect season to begin — the warm, dry air accelerates drying times, and the longer daylight hours give you more creative windows to work in.
Whether you are making botanical coasters for your coffee table, a set of plant markers for your herb garden, or textured dishes to hold beach treasures, each project teaches you something about the material and about your own creative instincts.
There is no pressure to achieve perfection on the first try. The beauty of handmade decor lies in its honest, human qualities — the slightly uneven edge, the gentle warp, the fingerprint preserved in clay.
Start with one small project this weekend. Roll out a bit of clay, press a leaf into it, and let it dry. You may find yourself reaching for another lump of clay before the first one has even cured.